# Assemble
# Symmetrical fit
Symmetrical fit supports the choice of two elements of the same part with the other parts facing each other.
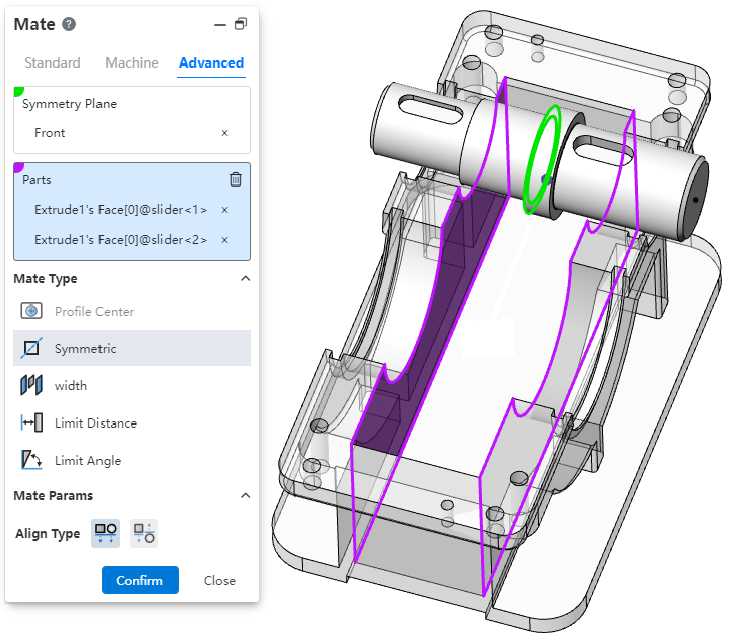
Description: The two faces of the part must be parallel.
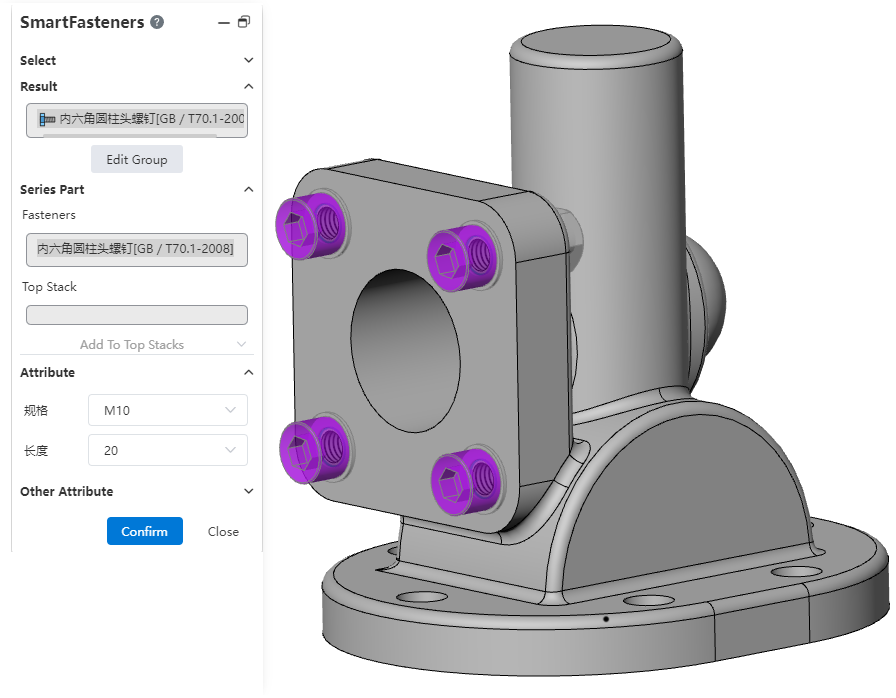
# Smart fasteners
New smart fastener command, which can automatically insert standard parts matching the model in the assembly.
Usage:
1) Open the "Smart Fastener" command.
2) Select the part or punch face to which you want to add the fastener.
3) Click the "Add" button to display a preview of the fastener.
4) Right-click the fastener to change the fastener type.
5) Click Edit Group, you can drag and drop to modify the group.
6) Set the properties of the fasteners corresponding to each group as needed, and add laminated parts (gaskets, etc.).
7) Click "OK" to finish adding.
Instructions:
You can delete unnecessary fasteners or groups by right-clicking them.
For holes with specifications generated by the hole command, the fasteners of the corresponding specifications are automatically selected by default.
The default fasteners corresponding to stretch cut and simple straight holes can be set in "System Settings - Smart fasteners".
Holes in the same group will use fasteners of the same specification, and holes in the same series will generate a smart fastener feature.
# Virtual Parts
New "Virtual Parts" feature. In the preliminary design stage, the assembly structure and parts need to be changed frequently. Virtual parts are stored in the assembly without generating independent documents, which can be quickly added, deleted, changed and checked to avoid producing a large number of invalid part documents and documents with the same name. After the design is completed, the virtual parts can be converted into ordinary parts for the subsequent process.
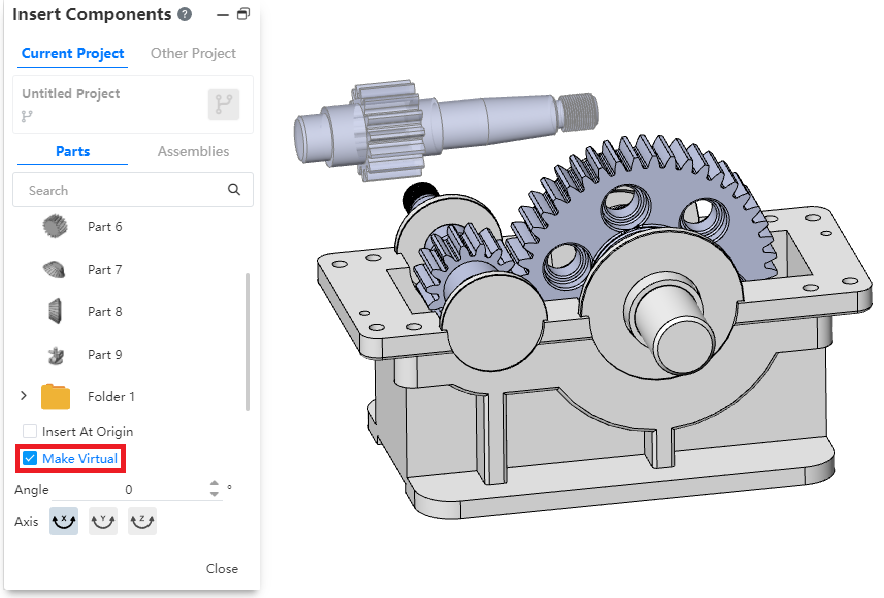
Method 1 of Use - Insert new virtual parts:
1) Open the "Insert Part or Assembly" command.
2) Check "Make Virtual".
3) Select parts for insertion, and after insertion is virtual parts.
4) Edit the virtual parts.
5) Right click virtual part - Save document.
6) Set the document name and path and click OK.
7) Save virtual parts as normal parts document.
Usage Method 2- Convert existing parts to virtual Parts:
1) Right-click an existing part in the assembly and click "Make Virtual" to convert it into a virtual part.
2) Edit virtual parts.
3) Right click virtual part - Save document.
4) Set the document name and path and click OK.
5) Save virtual parts as normal parts document.
# Sequence of sub-parts
Supports drag and drop the order of component instances in the list, while controlling the order in the material list.

How to use:
1) Open the assembly.
2) Drag and drop the part instance while holding down the left mouse button in the feature panel.
3) Release the left button where you want to place it to complete the drag and drop.
Note: Reordering can only be done in the same level of the same assembly.
# Animations
Animation explosion view, animation support save as video to local.
Animation - Save method:
1) Double-click on the animation list to activate the animation you want to save.
2) Click the "Export" button in the toolbar.
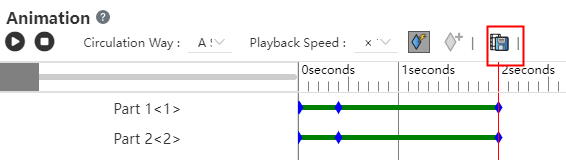
3) Set your video parameters.
4) Click OK to finish saving.
Animation Explosion View - Save method:
1) Right click on the Explosion View in the View panel and select "Animation Activated".
2) Pause the play.
3) Click the Export button.

4) Set the video parameters.
5) Click OK to finish saving.
Dialog box description:
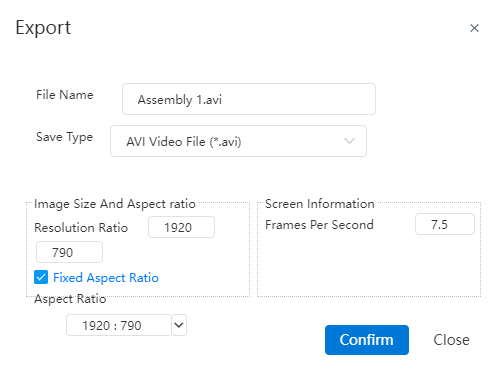
File name: Set the name of the exported video file.
Save type: Set the type of video file to be exported.
Resolution: Set the video resolution.
Fixed Aspect Ratio: Check this to keep the selected "Aspect ratio" when modifying the resolution.
Aspect Ratio: Set the aspect ratio of the video.
Frames per second: Sets the number of frames of the video.
# Large assembly mode
1 The lightweight and reduced state of parts can be maintained in large assembly mode. When the large assembly is opened, refresh the web page or switch the document, the system will keep the restore state of the parts and avoid repeatedly setting the state of the parts.
2 In the large assembly mode, you can directly right-click to edit features, fits, etc., and the system will automatically restore relevant parts after prompting for editing.

# Search Filter
Support for search filtering parts, features, etc. in the assembly panel.
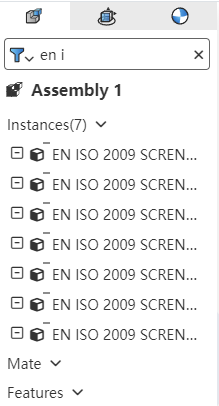
How to use:
1) Click the button in front of the search box.
2) Make your search Settings in the menu that pops up.
3) Type characters into the search box.
4) Based on the characters entered, the automatic filter displays eligible parts, features, etc.