# Data conversion
# Exporting geometry
New "Export Geometry" function, you can customize the solid, surface and other geometry in the export file.
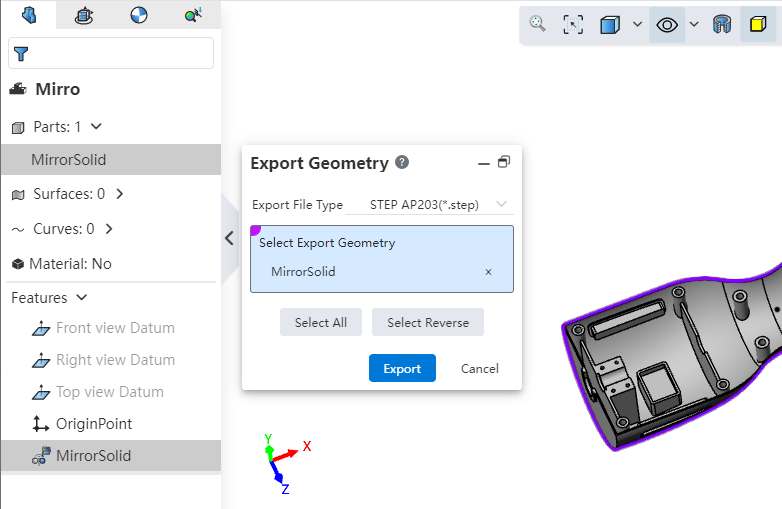
Use Method 1:
1) Right click on the geometry you want to export.
2) Click Export Geometry.
3) Select the geometry you want to export and the export format.
4) Click Export to finish exporting.
Use Method 2:
1) Click the Export command from the Import/Export drop-down menu.
2) Click the "Select Geometry to Export" button.
3) Select the geometry you want to export and the export format.
4) Click Export to finish exporting.
Dialog box control description:
Export format: Set the file format to be exported.
Select geometry to export: Used to select geometry to export.
Select All: Click on the geometry in the document to select all.
Reverse: Click to reverse the geometry in the document.
# Export format
Added support for exporting FBX formats.
Support for exporting OBJ\FBX format files with maps.
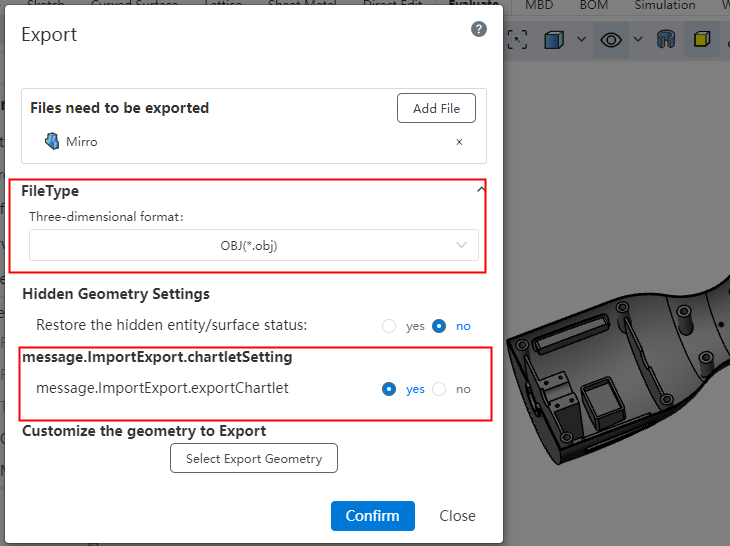
How to use:
1) Open the model with a map that you want to export.
2) Click the Export button in the Import/Export drop-down menu.
3) Set the export format to OBJ or FBX.
4) Set the export map option to "Yes".
5) Click OK.
# Import datum
Support to import SOLIDWORKS, CATIA format model datum.
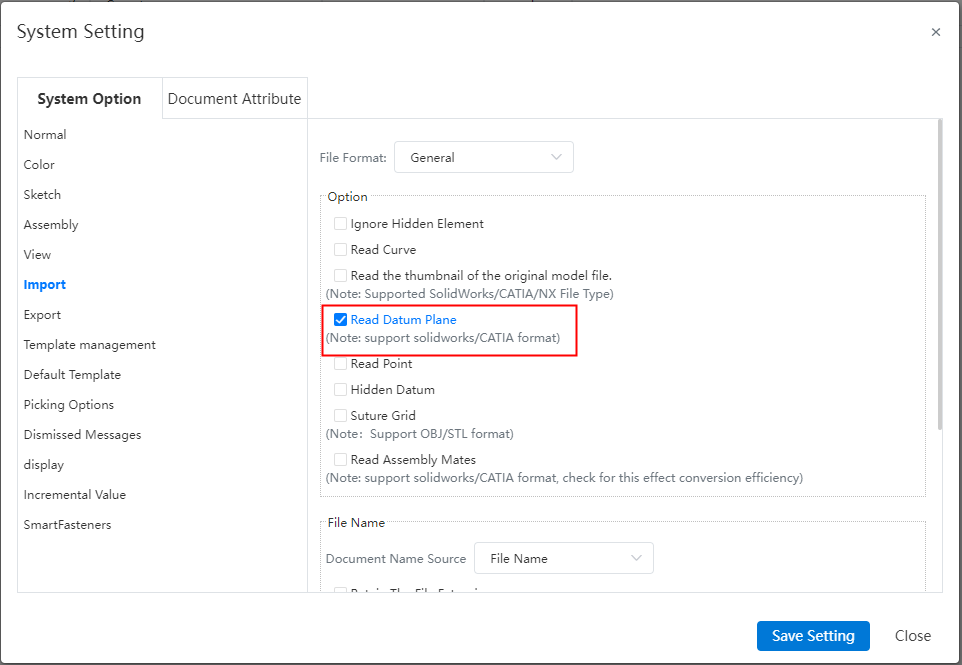
Usage:
Open System Settings and click System Options-Import.
Check Read datum (not checked by default).
# Import/export CrownCAD file
Added the CrownCAD file import and export function. You can click Export to Local and Import CrownCAD File in Import/Export. When exporting, you can decide whether to export the CrownCAD file including engineering drawings, standard parts, and templates.
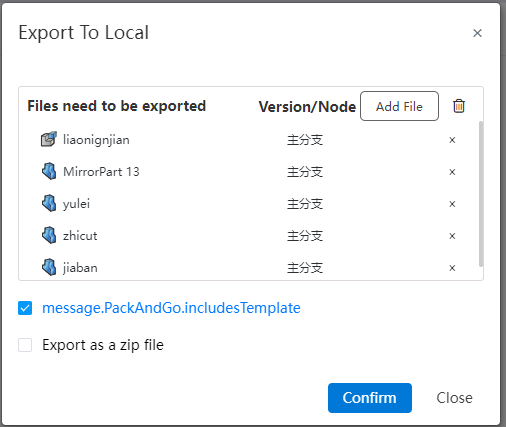
Directions to use:
Export to local:
Select [Export to Local] from the Import/Export drop-down box.
Set the check box to control the special content to be included when exporting, including drawings/standard parts and templates.
Select Nested View/Flat View to set whether to indent the files in the file list according to their affiliations.
File list, check what you want to pack.
Number of documents: Displays the number and total number of selected documents for each category to be packaged.
Document structure: Select the structure of the exported document.
Compressed package name: Enter the compressed package name, which defaults to the project name.
Click Export, select the template to be exported, support the user manual search or the system automatically search according to the selected document.

- Click OK.
Import the CrownCAD file:
Import, click the Import/Export drop down box and select Import CrownCAD file.
Package the model file along with the referenced template file.
Confirm the import, the system automatically recognizes and uses the template file.
Instructions:
When exporting the template file, the template file and model file are packaged as a zip compression package.
You can upload the template file as an unpacked file or as a ZIP package, but you cannot upload the template file together.