# Insert into a New Part
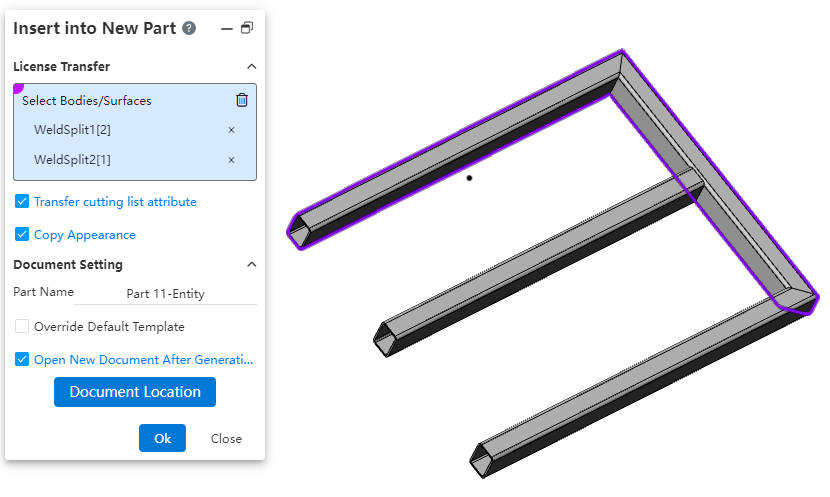
This functionality allows the insertion of solids/surfaces from the current document into a new part to facilitate further operations.
How to use:
Right-click on the solid(s)/surface(s) within the Feature Panel.
Click on the "Insert into a New Part" option in the context menu.
Select which solids/surfaces to transfer into the new part.
Adjust the options related to how the elements are moved or copied.
Click "OK" to create the new part and insert the selected elements.
Dialog Box Control Descriptions:
Select Solids/Surfaces:Choose the specific solids/surfaces you wish to transfer from the current document.
Transfer Cut List Properties:When a "Weldment" feature exists in the current document, enabling this option will copy the weldment cut list properties to the new document.
Copy Appearance Settings:By selecting this option, the visual appearance (color, transparency) of geometries in the original document is mirrored in the new document.
Part Name:Specify a name for the newly created part document here.
Override Default Template:Check this box to manually select the part template used for the new document. This allows customization beyond the default settings.
Open New Document Upon Creation:Enabling this option will automatically open the newly created part file once it is generated, saving time by bypassing a manual search step.
Document Location:Click on this button to navigate to and choose the directory where the new document will be saved. This provides flexibility in organizing your project files.
Note: Solids/surfaces in the new part document are not connected to the original geometry.