
# Styled Spline
Draw a Styled Spline in a 3D sketch.
Drawing Steps:
- In a 3D sketch, click the Styled Spline command. The Styled Spline dialog box appears.
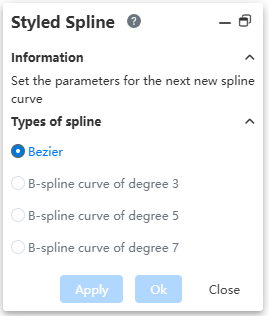
- Select the curve type to create.
- Click in the viewport to specify the control points of the Styled Spline. The method of specifying points is the same as drawing a line.
- You can switch planes while drawing. The interaction supports both the Tab key to switch and automatic detection of the plane direction.
- Snapping to elements is supported during drawing. The types of elements that can be snapped are the same as those for the spline command in 2D sketches.
- The through points of a 3D sketch spline do not have to lie on the same plane. The resulting curve may not be planar but can bend in space.
- Click Create, right-click, or double-click the left mouse button at the end point to complete the Styled Spline.
- Double-clicking the left mouse button: The spline will pass through the last double-clicked point.
- Right-clicking: The spline will not pass through the last right-clicked point.
- Control points can have constraints added with other elements:
- Individual start or end point: Fixed
- With a point: Coincident, Along X, Along Y, Along Z, Fixed
- With a line: Point on line, Fixed
- With an arc or circle: Concentric, Point on curve, Fixed
- After selecting the Styled Spline, you can drag the control points to adjust the curve shape.