# Share Collaboration
Shared collaboration enables multiple people to view and edit the same model at the same time to achieve data sharing.
# Share
# Share Project
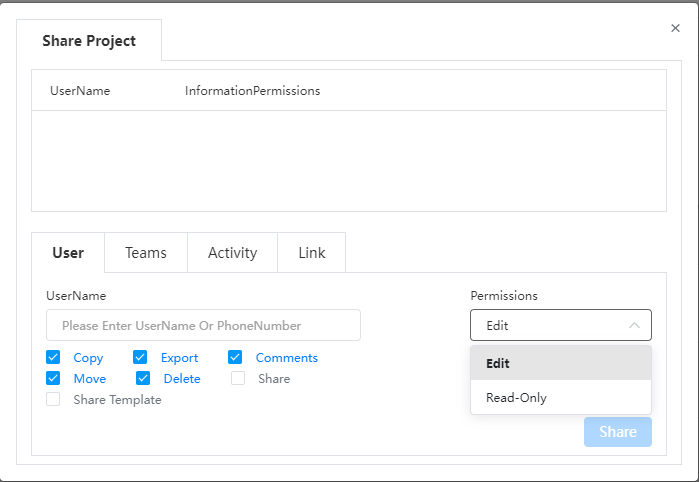
Project owners or users with sharing permissions can share projects with other users or teams.
Project owner can set permissions and cancel sharing to the shared person.
Project Owner: The person who created the project, only the project owner can delete the project.
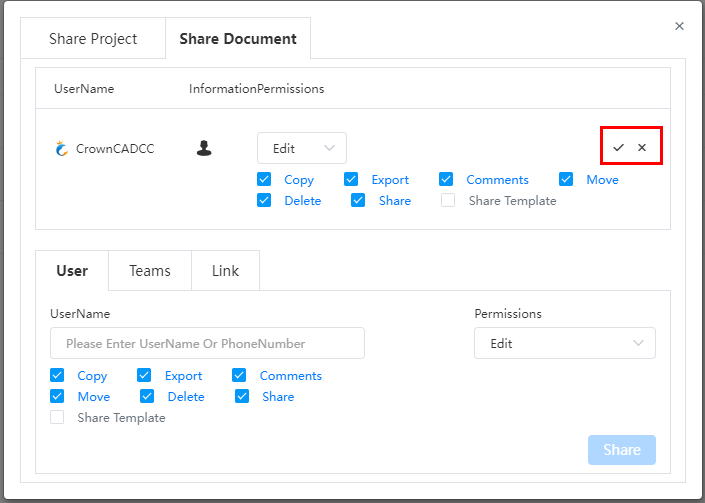
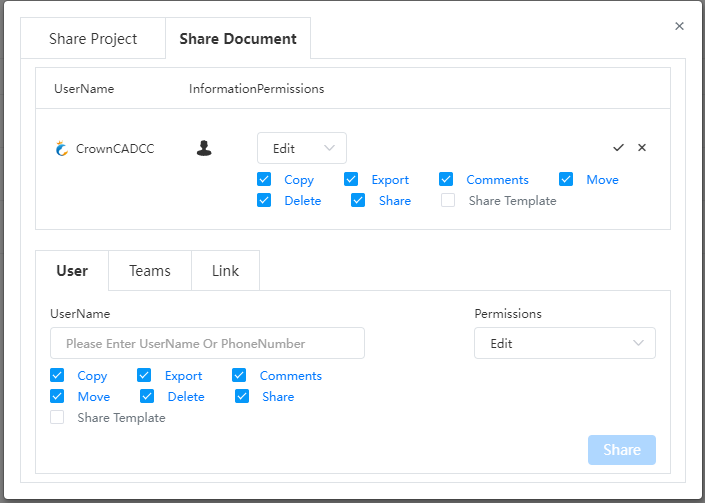
Users, teams: Project owners can share projects by entering user and team names. The audience can be one or more users or teams.
Activity: Only users who participated in the event will display Share to event. Items shared to the event are in read-only mode.

- Permissions: Can be set to edit, read-only.
Edit : The shared person can edit the shared document, and the editing effect on the document will be displayed simultaneously by the project owner and other shared people .
Read-only : The shared person can only view the shared document, but cannot edit it.
- Sharing options: Copy, export, comment, move, delete, share.
- Copy: The shared person can copy the shared document and create a copy for his own project .
- Export : Shareees can export documents to local files in formats such as iges , step , prt, catpart, sldprt, and x_t .
- Annotation : The shared person can annotate the document , and the project owner and other shared people can see the annotation synchronously.
- Move: The sharer can move documents and folders within the project.
- Delete: The sharer can delete documents and folders within the project.
- Share : The shareee can share the item with other users or teams.
- The permission is edit, you can choose to copy, export, comment, move, delete, share Settings to the shared.
- permission is read-only , and you can choose to copy and comment settings to the shared person
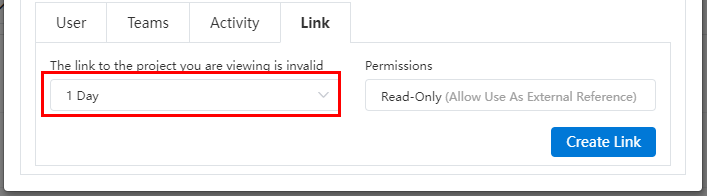
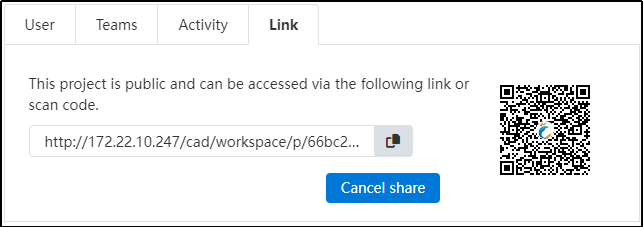
- Link/QR Code: Copy a link or QR code to the document so that it can be sent to other users.
- When the document is a public project, it can generate a link/QR code to share, and copy the link to share it with anyone .
- When the document is a private project, the link /QR code cannot be generated, and the link can only be generated if it is changed to a public project.
- The user can only view the document through thelink/QR code, no other permissions are granted.
- When creating a share link, you can specify the validity period of the link.
7. Remove, Edit permissions: Project owners or users with share permissions can edit the shared person's permissions or unshare them in the share list.
# Share Documents
Support sharing individual documents.
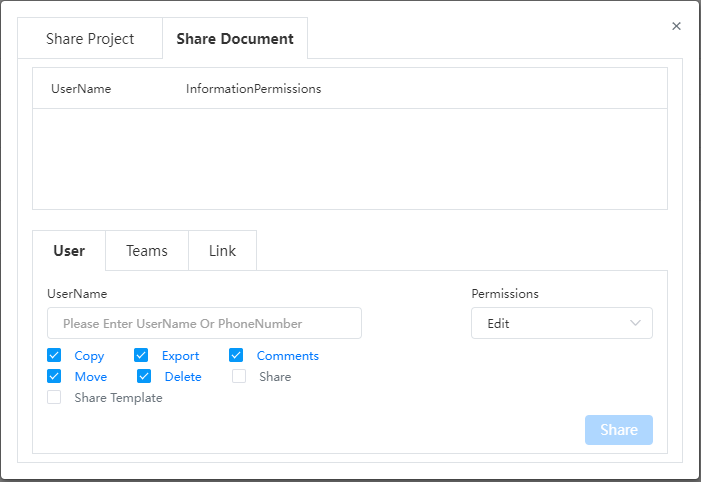
How to share:
1) Click the button  next to the name of the document within the project, or click the button in the title bar once you have entered the document.
2) Switch to the Share Document Tab page.
3) Set the user/team/campaign and permissions you want to target.
4) Click Share to finish sharing.
If the project where the document resides and the document itself are shared at the same time, the document itself has higher permission priority.
Check "Inherit parent permissions" so that the document permissions and the project where the document is located are the same.
# Share Templates
Currently supports sharing "document templates, custom property templates".
Sharing Method 1:
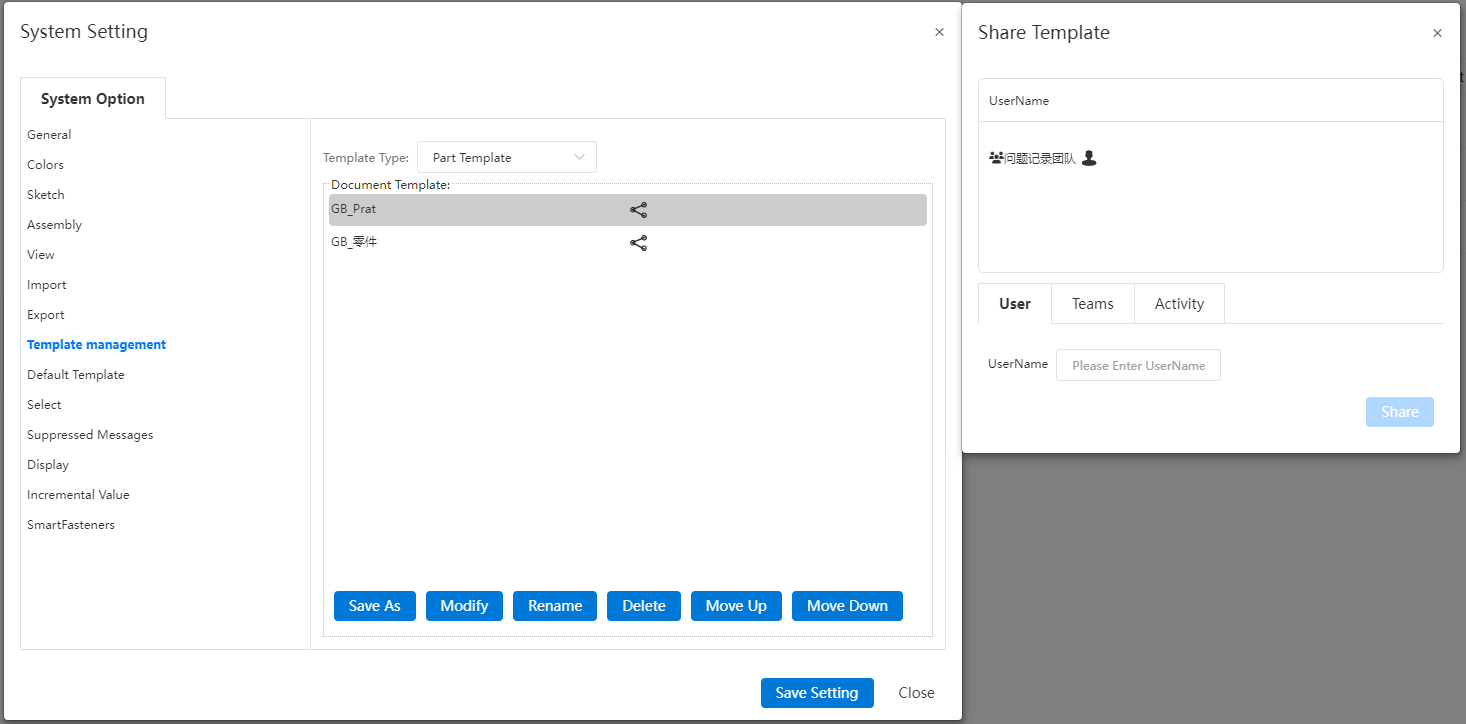
1) Open System Settings - Template Management - Parts/Assembly/Engineering Drawing Template.
2) Click the Share button after the template you want to share.
3) Set the target user/team/campaign.
4) Click the Share button to finish sharing.
Sharing Method 2:
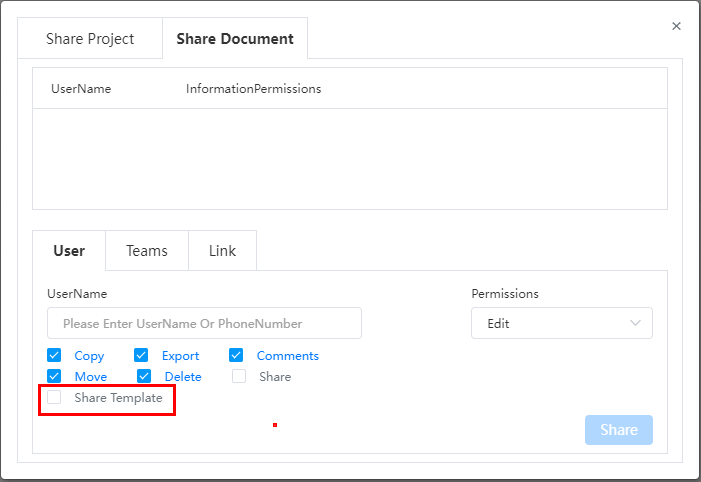
1) Check "Share Template" when sharing an item or document.
2) Click Share, and the template referenced in the project or document is shared synchronously.
To use the template:
1) Click New Document.
2) In the template drop down box, select the template obtained by sharing, which has a symbol in front of it.
3) Click OK to finish the creation with the template.
Note:The template cannot be cancelled after it has been shared. After sharing, the shared template is not associated with the source template.
# Collaboration
Multiple users working on the same document at the same time is called simultaneous editing or collaboration. All features added or any changes made are displayed to all collaborators in real time.
The creator of the document must share the document with other users before collaboration can take place.
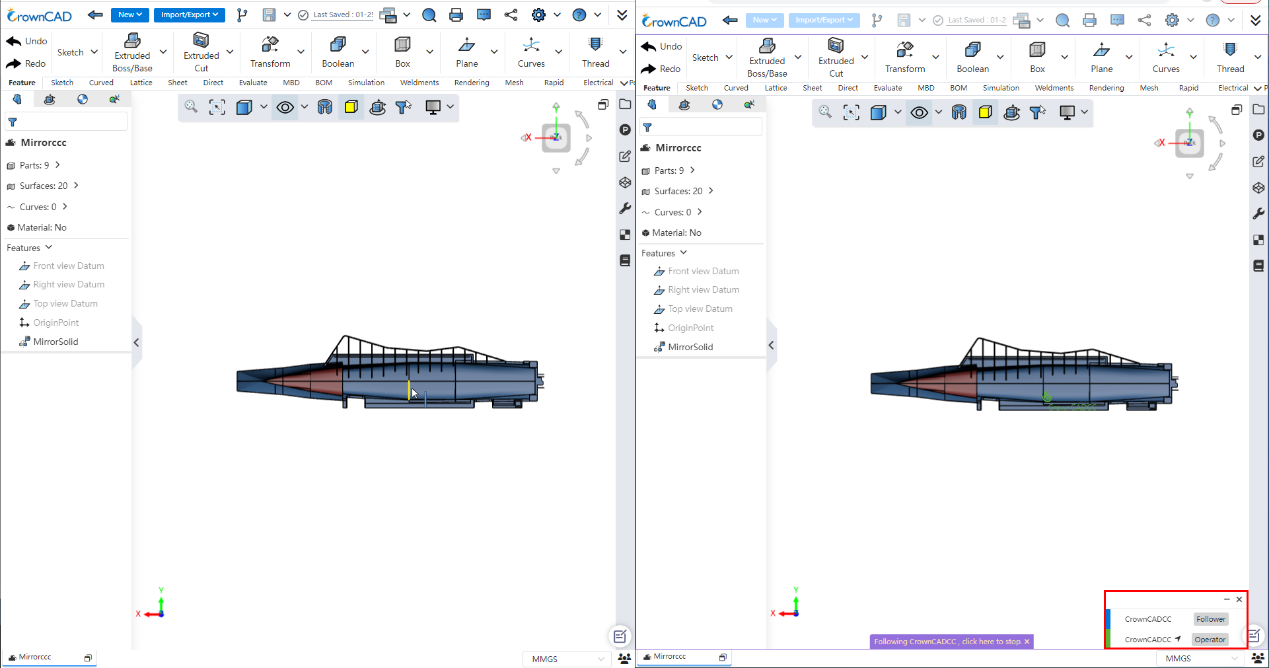
(1) Follow mode
Users collaborating in the same document can click the Collaborate button in the red box in the figure below  and choose to activate the follow mode, in which one user can see what another user is doing in real time. Click an empty space in the viewport to exit the follow state.
(2) Edit mode
Users collaborating in the same document can operate the model in the document and cooperate to complete the model design.
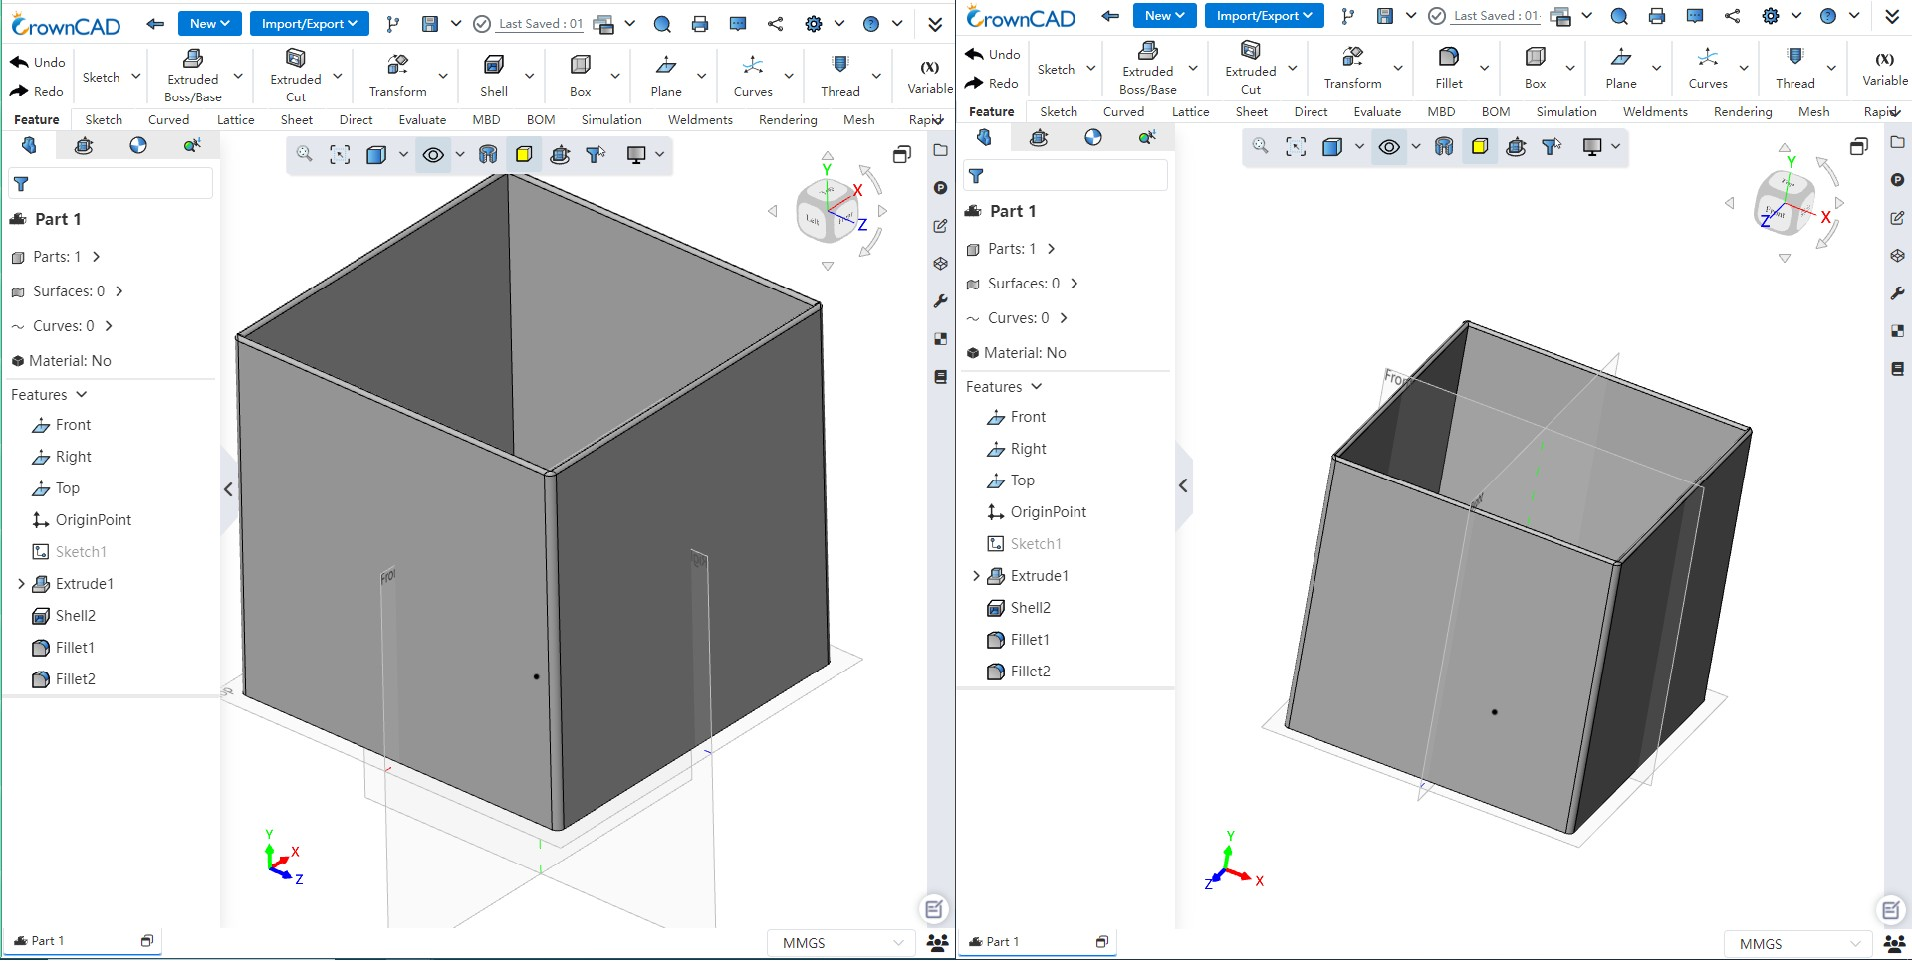
Collaboration Instructions:
1)As shown in the figure, the user on the left first performs the shelling operation on the model, and the model in the user interface on the right is updated to the model after shelling.
2)As shown in the figure, the user on the right performs a rounding operation on the model, and the model in the user interface on the left is updated to the model after rounding.
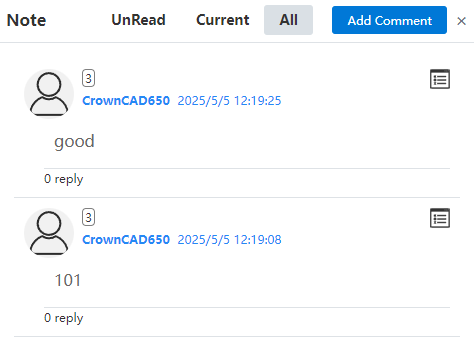
# Note
For files linked or set as shared items, viewers can click this option  to comment and reply here. The interface is as follows:

The descriptions of each control are as follows:
- Unread: Displays unread messages.
- Current: The add comment dialog box is displayed without comments, and the add order is displayed from bottom to top when there are comments;
- All: Displays all comments;
- Voice
 :Click to switch between voice input and text input. After switching to voice input, hold down the left mouse button to record.

- Label
 :You can pick up the graphic element of the viewport to add a mark;
 - Screenshot
 :Capture the entire graphics area of the software, and can crop, mirror, rotate, comment, filter and other operations on the screenshot of the picture.

- When a message is received, there will be a red dot in the upper right corner of the note icon
 ,and it will blink. After clicking, you can reply to the comment, click the picture to view the larger image, click the white box behind the question comment, and check it to close the question.