# Replace Model
Select the view or view feature to specify the reference model that the model replaces the current view.
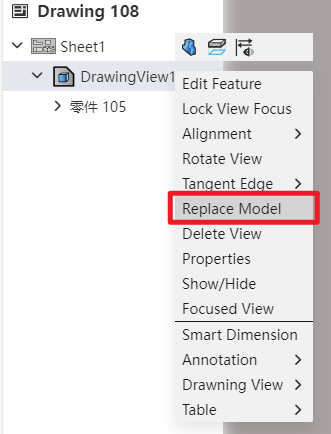
- Right-click the view in the project drawing and select the "Replace Model" command to start the Replace view feature.
Select the view or view feature and specify the reference model that the model replaces the current view.
Right-click the view in the drawing and select the "Replace Model" command to start the replace view function.
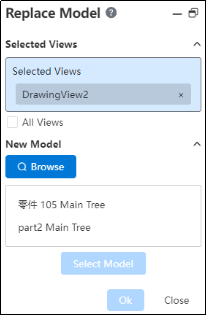
Click Select View in the Viewport or View panel.
- Select the view rule:
- Supports picking in the viewport or view panel
- Can only pick up the first level of the model view, can not select the subview.
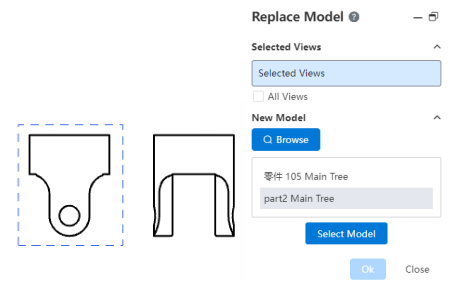
Click the "Browse" button to select the target part or assembly;

Click the "Select model" button, the selected parts are displayed in the dialog box, and judge the view type in "Selected view", according to different types, display the corresponding icon in front of the view:


Normal view No replacement Multiple Instances
- Normal: A view that can be replaced normally, showing only the view name and no icon
- Not replaced: The model inside the view is the same as the selected target model. A red X is displayed before the view name, this type of view does not perform a replacement operation.
Click OK to complete the replacement.


- Normal View replaces normally, in the same direction as the original view
- The Do Not Replace view does not replace
- The subview model of the replaced model's view changes.
After the model is replaced, the annotations in the original view are deleted.