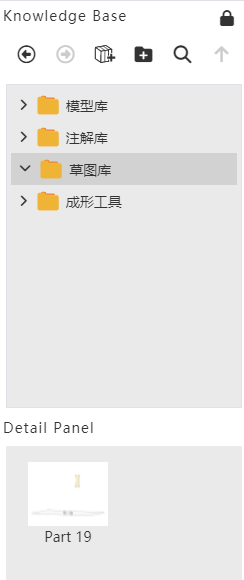
# Sketch Library
The 2D sketches in the parts can be saved to the knowledge base for quick follow-up calls and improved design efficiency.

# Add to library
Method 1:
1)Right-click sketch in feature list and click [Add to Knowledge Base].
2)Set the name and storage location in the Add to Knowledge Base dialog box.
3)Click OK to finish adding.
Method 2:
1)Open the knowledge base and click Add to Library.
2)Pick up the sketch in the feature list or viewport.
3)Set the name and storage location in the Add to Knowledge Base dialog box.
4)Click OK to finish adding.
Note 1:After the sketch is stored in the library, the internal constraints of the sketch remain, and the external constraints are automatically deleted. For example: the horizontal constraints of the line are retained, and the isometric constraints of the line and the external line are deleted.
Note 2:The stored sketch is disconnected from the source sketch, and any changes made to the source sketch do not affect the sketch in the library.
# Call Sketch
Method 1:
1)In the Sketch Gallery Details panel, select Sketch and right click the [Insert] button.
2)Set the sketch location in the Locate Sketch dialog box and click OK to enter the sketch.
3)To display the preview in the sketch, select the location you want to place according to the preview by clicking the left mouse button.
4)Multiple identical elements can be generated by left-clicking in different locations.
5)Exit the sketch.
Method 2:
1)Select sketch from Knowledge Base in document, drag to viewport and release left mouse button.
2)Set the sketch location in the Locate Sketch dialog box and click OK to enter the sketch.
3)To display the preview in the sketch, select the location you want to place according to the preview by clicking the left mouse button.
4)Multiple identical elements can be generated by left-clicking in different locations.
5)Exit the sketch.
Method 3:
1)Create and go into a sketch.
2)Choose the sketches in the document from the knowledge base, right click on the "insert" button, release the left mouse button or drag and drop to the viewport.
3)To display a preview in the sketch, select where you want to place it according to the preview and click the left mouse button.
4)Multiple identical elements can be generated by left-clicking in different locations.
5)Exit the sketch.
# Manage Sketches
Right-click the sketch you want to manage in the sketch gallery to "Delete, rename, edit".
