# Delete Face
Remove part of a surface from a surface, or remove one or more faces from a solid to create a surface.
# How to use
Click to enter the Delete face command, whose interface is shown as follows.

The meanings of each control are as follows:
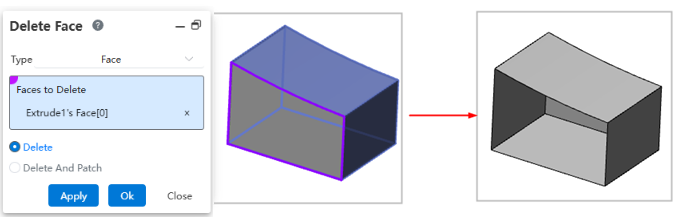
- Face to delete: Select one or more faces that you want to delete.
Note:
Solid surface or surface can be selected for the surface to be deleted, multiple choices are supported, and the selected surface must belong to the same entity or surface.
Delete: The selected surface is deleted, and the entity becomes a surface type.
Delete and Patch: Deletes selected surfaces and automatically patches and trims remaining surfaces.
Note:
Solid surfaces are still solid after they are deleted and patched. The same is true for surfaces.
Example: Select the surface to be deleted, preview and result as shown in the figure below.
Example: Select Delete and repair, preview and result as shown below.

# Delete Face
Usage - Manual Selection:
Open the "Delete Face" command.
Change the type to "Hole", and uncheck "Select The Hole By Size".
Click or box-select holes in the viewport to pick them.
Holes of the same size as the selected hole but not picked will be highlighted in green for selection.
Set "Delete and Patch" to ensure the solid can be patched after deleting the hole.
Click OK to complete deletion.
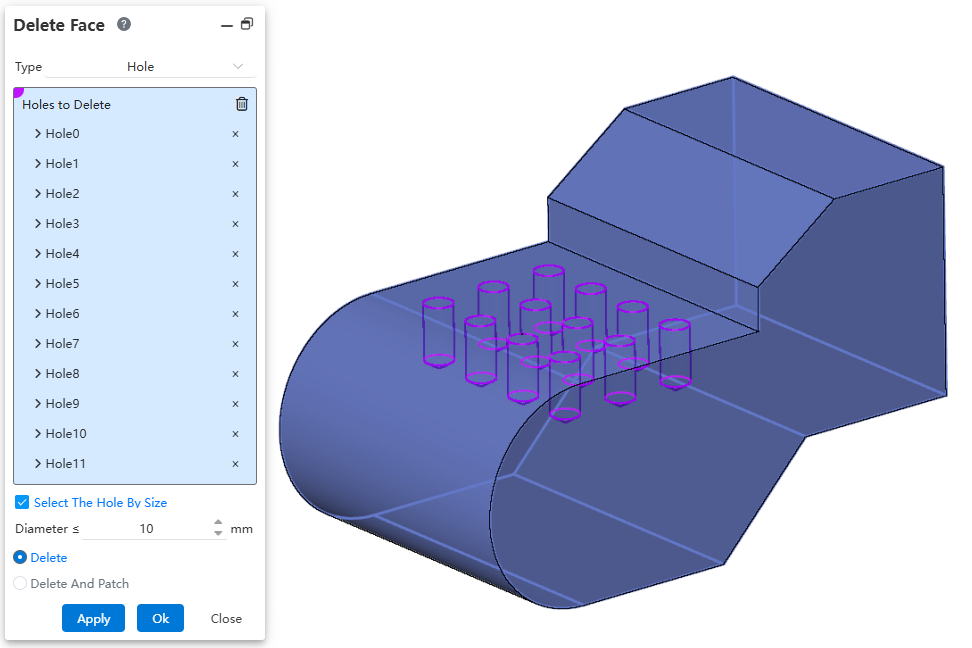
Usage - Automatic Selection:
Open the "Delete Face" command.
Change the type to "Hole", and check "Select The Hole By Size".
Set the hole diameter parameter.
Click or box-select holes in the viewport; all holes less than or equal to the specified diameter will be automatically picked.
Set "Delete and Patch" to ensure the solid can be patched after deleting the hole.
Click OK to complete deletion.