# Realistic Rendering
Use a ray tracing renderer to achieve realistic rendering effects.
Configuration Requirements: Realistic rendering requires high computer configuration. It is recommended to use a high-spec computer to run this function.
- Low-spec graphics card (VRAM under 4GB) limit: 200,000 faces;
- Mid-spec graphics card (VRAM 4-8GB) limit: 10 million faces;
- High-spec graphics card (VRAM over 8GB) limit: 15 million faces.
Note: In System Settings, you can adjust the current device configuration to enable larger models.
Usage:
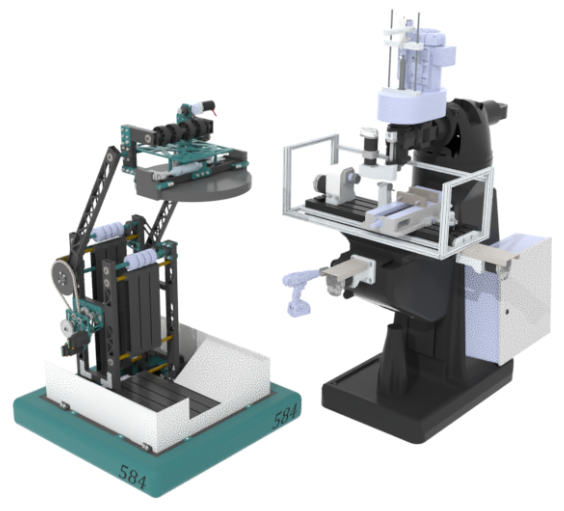
- Open the model to be rendered, set "Appearance, Light Source, Scene".
- Click the "Ray Tracing Renderer" command to enter ray tracing rendering mode.
- Click the "Ray Tracing Renderer Parameters" command to adjust rendering parameters.
- Keep the model stationary and wait for the scene to render.
- Click the Save Image button to download the rendered scene to the local device.
- Click the "Exit Ray Tracing Renderer" command to exit ray tracing rendering mode.
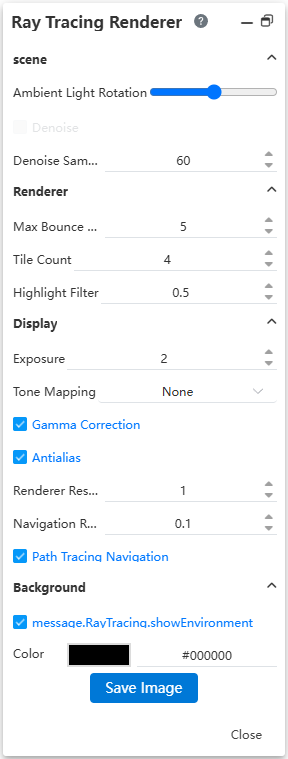
Dialog Box Control Descriptions:
- Scene
- Environment Light Rotation: Rotates the environment map in space, changing its orientation, which affects the lighting direction and shadow distribution of objects in the scene.
- Denoise: Processes rendered output images or video frames to eliminate chaotic pixels (i.e., "noise") caused by ray tracing, insufficient sampling, or noise interference, resulting in a cleaner and clearer visual effect. This option is unavailable when the browser does not support WebGPU.
- Denoise Sampling: Performs denoising on a specific frame image in the video to improve the visual quality of that frame.
- Super Resolution: Reconstructs low-resolution images into high-resolution images through algorithms, visually enhancing details,clarity, and realism without actually rendering higher-resolution pixels.This option is unavailable when the browser does not support WebGPU.
- Super Resolution Multiplier: Represents the enhancement level of super resolution processing.
- Renderer
- Maximum Bounces: Used to control the maximum number of times light reflects or refracts in the scene.
- Tile Count: Used to improve rendering performance and memory efficiency.
- Specular Filter: Determines which pixels or data values will be "clamped" to a specified upper or lower limit to prevent numerical overflow or anomalies.
- Display
- Exposure: A parameter that controls the overall brightness of the scene, determining whether the scene looks too bright,too dark, or normally exposed in the final output.
- Tone Mapping: A key step in converting High Dynamic Range (HDR) images (such as real lighting calculation results) to Low Dynamic Range (LDR) images (such as the 0~1 color range displayable by monitors),used to simulate the human eye's adaptation process to light, ensuring the scene is neither overexposed nor underexposed, maintaining visual realism.
- Gamma Correction: Used to compensate for the non-linear brightness response characteristics of display devices, ensuring consistent brightness display across different screens, avoiding scenes that are too dark or too bright.
- Anti-Aliasing: After rendering is complete, blurs the edges of the image to visually reduce the jagged effect.
- Render Resolution: The pixel size of the final output image,i.e., the width and height of the rendering result (e.g., 1920×1080,3840×2160, etc.).
- Navigation Resolution: The lower-resolution temporary image used by the renderer during scene navigation (such as rotating, panning, zooming the camera) to achieve smooth real-time interaction.
- Path Tracing Navigation: Simulates the propagation path of real light in the scene (reflection, refraction,shadows, etc.) to achieve accurate identification and interaction response of object positions, surface properties, and spatial relationships, thereby providing a more realistic and intuitive navigation experience.
- Background
- Show Environment: Controls whether to display the environment.
- Background Color: Sets the background color.
- Save Image: Click to save the current rendering effect to the local device.