
# Helix and Spiral
Use to create a cylindrical/conical spiral curve or vortex line.
Click  to enter the spiral curve command, whose interface is shown below.
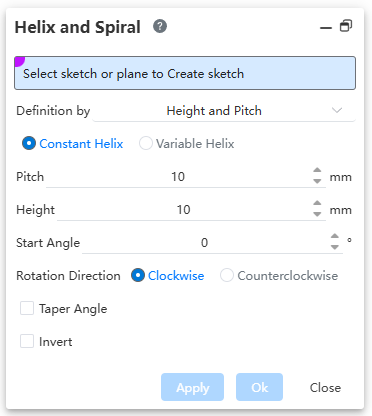
- Select Sketch: Select an existing sketch containing only one circle, or select a plane to sketch a circle.
- Definition by: Three methods are available, each corresponding to different parameters with different preview effects: "Pitch and Height", "Pitch and Revolutions", and "Height and Revolutions".
- Constant Helix, Variable Heix: Select whether the pitch of the helix is constant or variable.
- Parameters: Set the helix parameters based on the selected definition method.
- Start Angle: Set the start angle of the helix.
- Rotation Direction: Includes "Clockwise" and "Counterclockwise".
- Taper Angle: Unchecked by default. When checked, you can set the taper angle value to create a tapered helix. This option is available only for Constant Helix.
- Invert: Unchecked by default. When checked, the curve rotates in the opposite direction around the rotation axis.
Note:
The spiral curve command is based on the existence of a sketch circle, and the sketch can only contain one circle.
# Helix
Usage - Constant Helix:
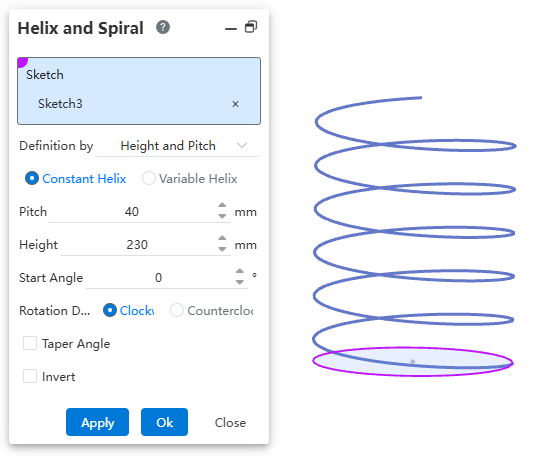
Click the "Helix and Spiral" command.
Select or sketch a sketch containing only one circle.
Choose the definition method as needed.
Set the parameters corresponding to the selected definition method.
Click the "Apply" or "OK" button to complete the helix.
Note: The "Pitch, Height, Revolutions" parameters of a helix are interrelated. Specifying any two allows the third to be calculated automatically.
Pitch: The distance between helical curves. In a Constant Helix, the pitch is uniform for all segments; in a Variable Helix, the pitch can vary between segments.
Height: The total height of the helical curve.
Revolutions: The number of revolutions of the helical curve.
Usage - Variable Helix:
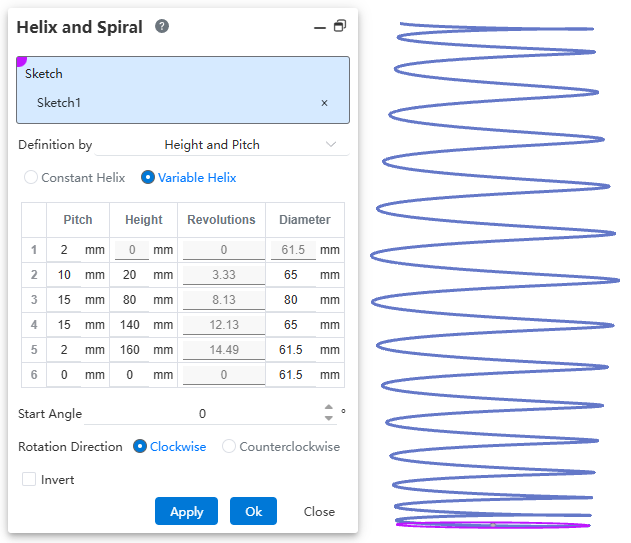
Open the "Helix and Spiral" command.
Select a circular sketch.
Select a definition method as needed, then choose the "Variable Helix" type.
In the table, set the Pitch, Height, Revolutions, and Diameter parameters for each segment of the helix.
Click the index number in the first column of the table to select a row of parameters. Right-click to delete or add parameter records.
Set other parameters such as Start Angle.
Click OK to complete the creation.
Note 1: The three parameters—Pitch, Height, and Revolutions—are interconvertible. Through the definition method setting, you can specify which two parameters to enter in the table; the remaining parameter will be automatically calculated based on the entered values.
Note 2: The diameter of the first segment is the diameter of the selected sketch circle and cannot be modified in the table. The diameters of subsequent segments can be modified in the table.
# Spiral
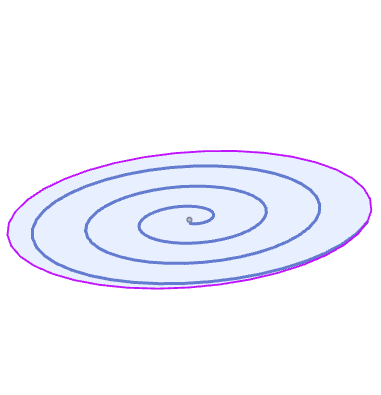
How to use:
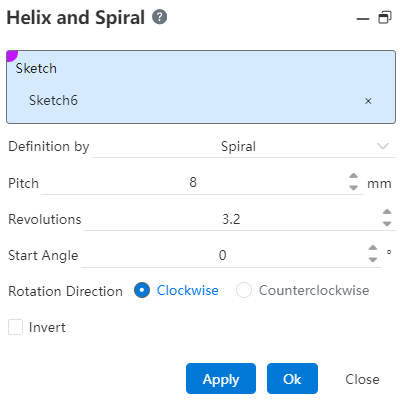
1) Click the Helix/Vortex Line command.
2) Select or draw a sketch that contains only one circle.
3) Choose "Vortex Line" for the way you define it.
4) Set parameters such as pitch and starting Angle as needed
5) Click the Apply or OK button to complete the vortex line.
Dialog box control description:
Sketch: Pick up a sketch that contains only one circle, or pick up the plane to draw a sketch that contains only one circle.
How to define: Select a vortex line to create a vortex line.
Pitch: Set the pitch of the vortex line.
Number of turns: Sets the number of turns of the vortex line.
Starting Angle: Set the rotation Angle of the starting point of the vortex line.
Rotation direction: Set the rotation direction of the vortex line.
Reverse: Check to make the vortex line switch to rotating outside the circle and inside the circle.
← Split Line Curve →