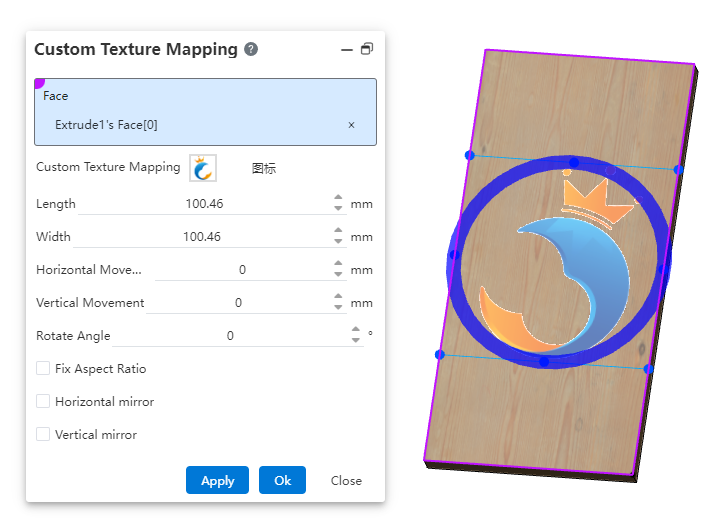
# Custom Texture Mapping
Custom map
What to do:
- Stickers can be set in two ways:
Method 1: Select a map in the gallery on the right side of the viewport, drag it to the model surface in the viewport, press the custom map command, and automatically fill the selected surface and map in the dialog box.
Method 2: Click the Custom Texture Mapping command in the Rendering module to open the dialog box.
Select a face in the viewport, only one plane can be selected.
Select a tile in the tile list and a preview appears in the viewport, or click Upload Local Picture.
You can change the size and position of a tile by dragging Handle or adjusting parameters in the dialog box.
- Move:Hold down the left button while placing the mouse in a rectangular area
- Rotate:Hold and drag the blue circle
- Resize:Hold down the vertex or midpoint of the rectangle's edge line and drag to change the size
- Click Apply or OK to complete the custom map.
Note:Stickers can be added to both parts and assemblies, adding stickers to assemblies directly affects parts.