# Detail View
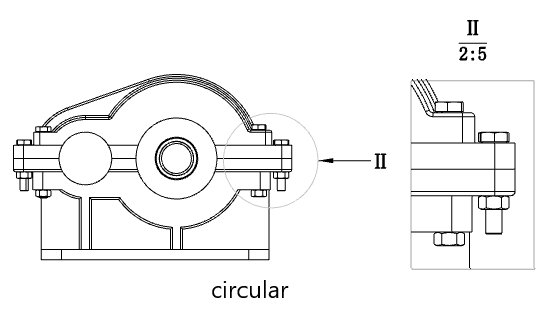
Generate a local view by using the local view command.
The steps to generate it are as follows:
Click the Local view command
 to bring up the Local View dialog box.
Click two dots on the view you want to generate the local view to create a circle.
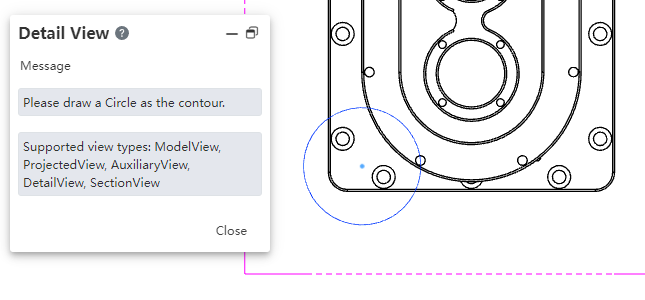
- Move the mouse and a preview of the local view appears at the mouse.
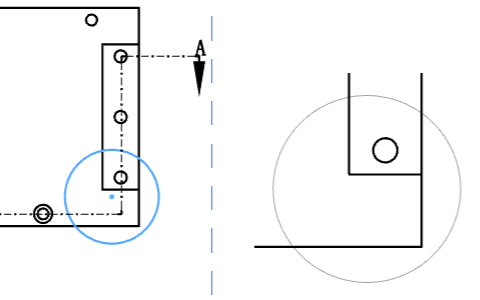
Move to the location where you want to place the local view and click to generate the local view.
Click ESC or the Cancel button in the dialog box to close the local view dialog.
Click the local view that has been created to modify the display style of the local view.
The outline of the local view can be modified in the following ways:
- Right click the scope of the local view in the parent view and select "Edit Local View Outline" to enter the state of editing the sketch.
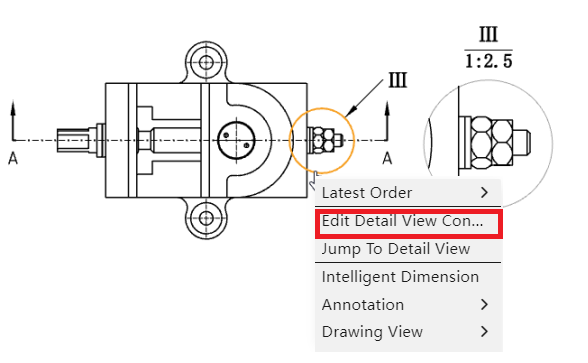
Drag and drop to adjust the position or size of the circle, or draw and select a new closed sketch outline.
Exit the sketch and finish the outline modification.
Note 1:Model view, projection view, auxiliary view, local view, and section view are supported as the parent view of the local view.
Note 2: When editing an outline, if you want to select another closed sketch outline as a range outline, you must select that closed sketch outline before exiting the sketch.
Note 3: When the outline is not a circle, you can set the style of the outline in the parent view to "Outline, Circle".
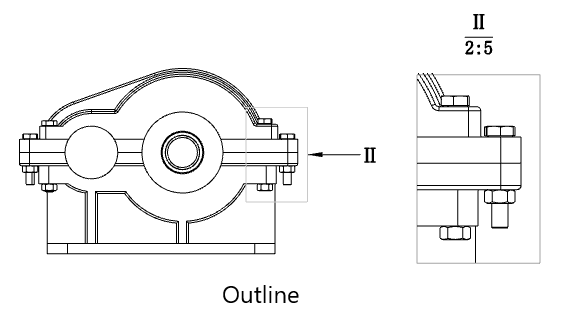
Outline: The outline in the superview is the same as the drawn outline
Circle: The outline in the parent view is the outer circle that draws the outline
This option only affects the style of the outline in the parent view, and does not affect the local view display