# Curve Driven Component Pattern
Curve arrays can be arranged in a curved pattern and replicated at a set distance. Its command interface is shown in the following figure.
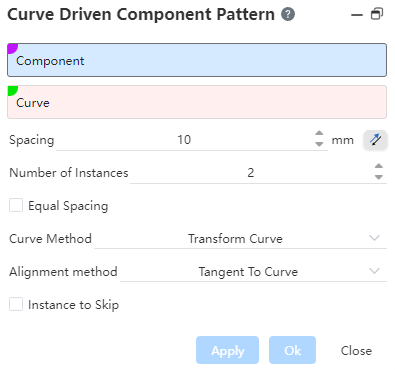
Curve array is to perform arrays in two directions for the top-most instance. If a sub-instance is selected in the viewport, the array is still performed on the top-most instance where it is located. The description of each control is as follows:
Component: Pick the instance that needs to be arrayed.
Curve: Pick a line as an array path, you can multi-select, the multi-selection line segment must be a continuous line segment, the array model is arranged in this path.
Distance: The curve array spacing is set at this distance, and the distance parameter cannot be adjusted when Equal Spacing is checked.
Reverse: For the orientation setting, click to preview the model in the opposite direction you currently selected.
Number of instances: The number of entities arrayed in the current direction.
Equal Spacing: When this option is selected, the total length of the used curve segments is divided equally according to the number of instances to calculate the spacing. When this option is not selected, the set distance is used as the spacing of each instance pattern.
Curve method: There are two types, namely "Convert Curve" and "Equal Distance Curve". When selecting Convert Curve, the straight line distance from the origin of the selected curve to the instance is consistent with the instance of the pattern. The vertical distance to the instance is the same as the instance of the array.
There are two types, "Tangent to Curve" and "Snap to Source". When Tangent to Curve is selected, all instances of the pattern remain tangent to the curve. When Snap to Source is selected, all instances of the pattern are aligned to the source instance. keep it aligned
Skip Instance: When this option is selected, the origin of the model to be skipped is picked in the pattern preview, and the picked origin does not generate the model.
Example: In the following figure, you can pick up the instance and curve, set the parameters, The effect is shown in the following figure.
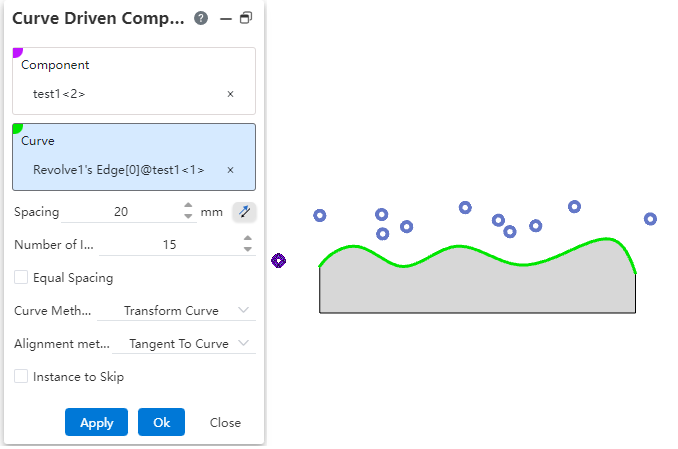
Click "OK" to complete this operation, The final effect is shown in the figure below.
