# Extruded Surface
Stretch sketches, curves, edges, and so on a certain distance in a specified direction to extend the curve into a surface.
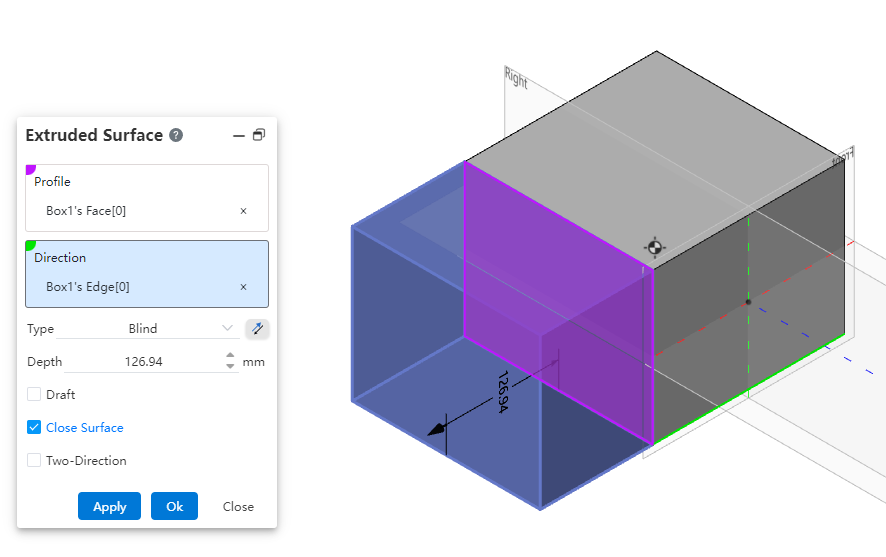
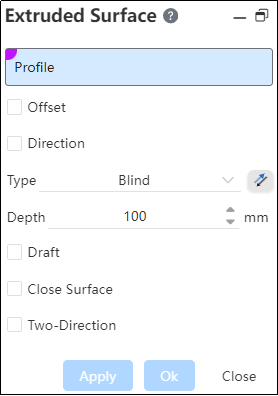
Click  to enter the Extrude Surface command, the interface of which is shown in the following figure.
The functions of each control are as follows:
- Outline: Select the outline that needs to be stretched, which can be a sketch, a sketch line, or a polygon.
Note:
- If the profile selects the entire sketch, the sketch can contain only one open or closed loop;
- If the sketch can contain multiple closed or open loops, select one of the lines or a continuous set of chains when selecting the profile.
Offset: Starts the stretch from a plane or its opposite plane that is some distance from the current sketch plane. Check to enter an offset distance.
Direction: After checking, you can customize the stretch direction, pick a straight line or two points, and the stretch direction defaults to sketch normal when not checked.
Note:
When the extrusion profile is a polygon, the extrusion direction must be defined.
Method: There are three ways, different ways correspond to different parameters, you can preview different stretching effects. The methods are "given depth", "form to surface", and "symmetry on both sides".
Reverse: The stretch direction is positive and negative, and the stretch direction is opposite to the default direction after checking.
Draft: Cone the extruded surface. You can enter parameters directly, or you can drag and drop Handle to adjust the draft angle.
Back Cover: If the stretched profile is a closed profile, after checking the back cover, a plane is automatically generated at the end of the stretch.
Direction 2: After checking, use the sketch plane as the datum to stretch in two directions at the same time, and select different ways to correspond to different parameters and directions 1 way combination, preview the corresponding stretch effect. The methods are "given depth" and "form to surface".
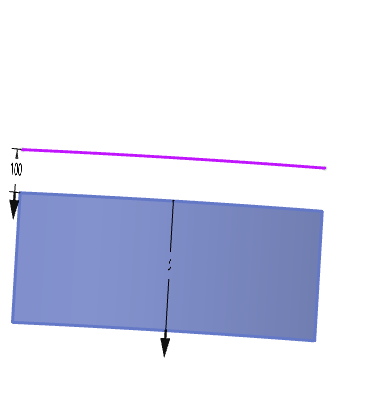
# Blind
Depth: In millimeters, stretched in a positive direction from the sketch plane, adjust the depth of the stretch by entering parameters or dragging the stretch direction arrow.
Reverse: After clicking, the stretch direction is changed from positive to reverse.
Draft: After ticking the draft, preview the draft effect of the default angle, and adjust the draft angle by entering parameters or dragging the angle direction arrow.
Back Cover: When the back cover is checked, the closed profile automatically forms a plane at the end of the stretch.
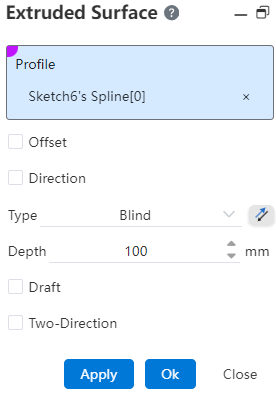
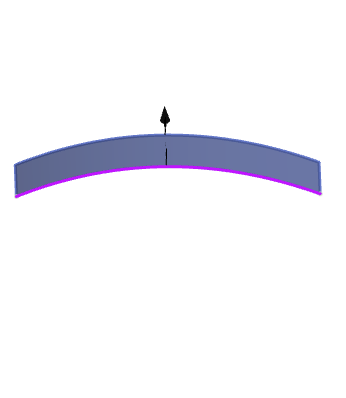
Example: The stretch effect for a given depth is shown in the following illustration.
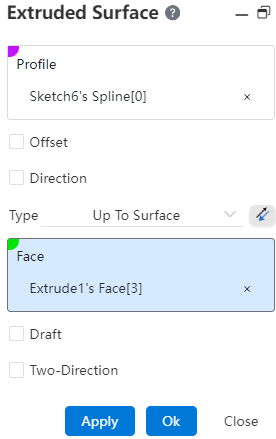
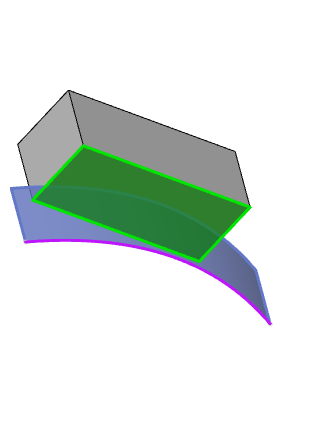
# Up To Surface
Faces: Pick a solid face, an infinite plane, a surface that contains a stretched outline entirely.
Drawing: The surface is drawn according to the drawing Angle.
Reverse: After checking, the stretch direction is changed from positive direction to reverse direction stretch.
Back Cover: When back cover is checked, the closed profile automatically generates a plane at the end of the stretch.
Example: The shape-to-face down stretch effect is shown in the following illustration.
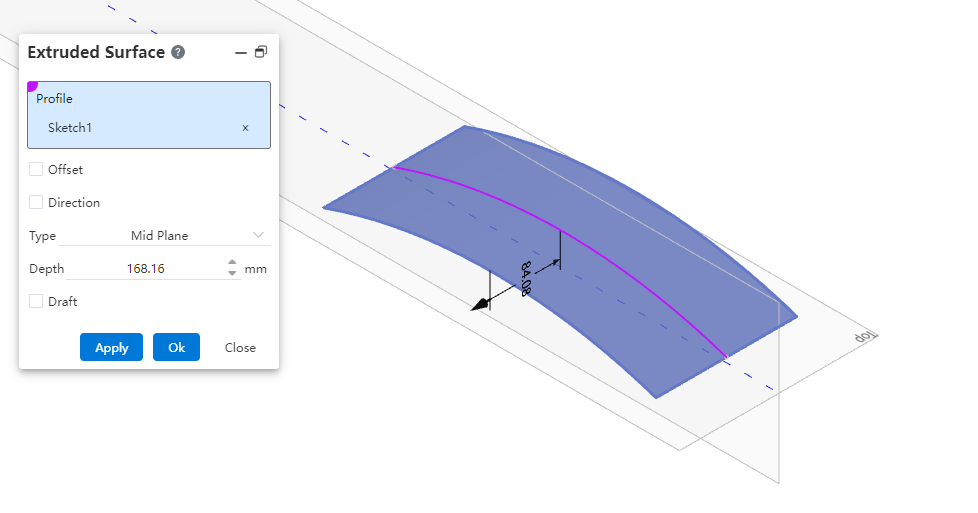
# Mid Plane
1.Depth: Draw symmetrically in both directions based on the sketch datum, depth can be adjusted by entering values or dragging arrows.
2.Drawing: drawing the drawn surface according to the drawing Angle.
3.Back cover: When checked, the closed contour automatically generates a flat surface at the end of the drawing position.
Example: The effect of bilateral symmetric drawing is shown in the image below.
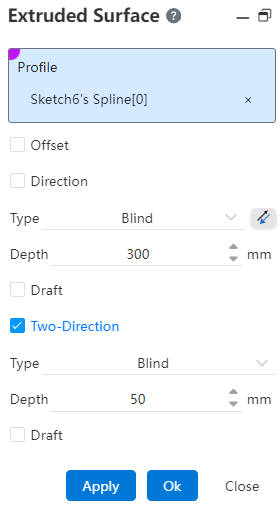
# Two-Direction
Check and draw symmetrically in both directions using the sketch datum as a reference.
The extrusion method has a given depth, is formed to a polygon, and operates in the same way as above.
Example: Shape to Polygon & Give Depth Stretch effect as shown in the following illustration.
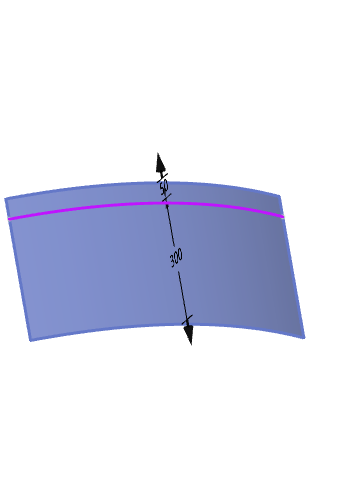
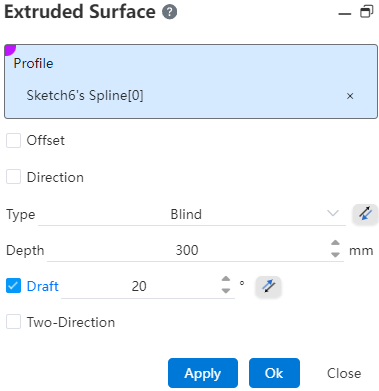
# Draft
- After ticking, enter the draft angle. If necessary, select Reverse.
Example: Drawing inward is shown in the following figure.


Example: Drafting outwards is shown in the following figure.
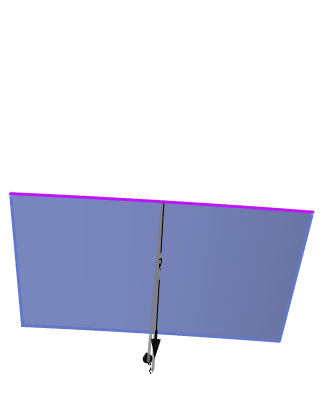
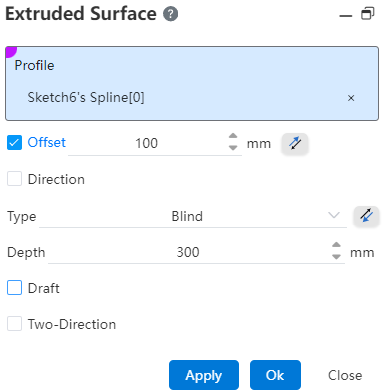
# Offset
- After checking, enter the offset distance. If necessary, select Reverse.
Example: The offset is shown in the following figure.
# Back Cover
- When checked, a curved surface is automatically generated at the end of the stretch when the stretch contour is a closed area.
Example: The back cover is shown in the following figure.