# Bill Of Materials Table
Use to generate a material detail sheet.
# Create a Bill Of Materials Table
The generation steps are as follows:
- Click the Material Detail Sheet command to bring up the Material Detail Sheet dialog box.
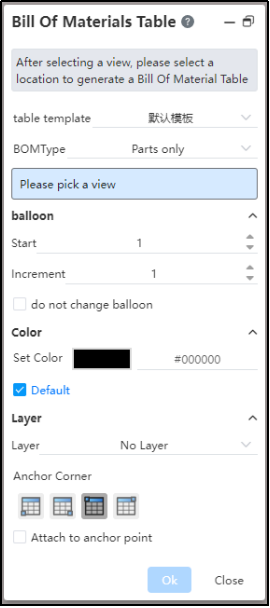
- Set the Material schedule type and location in the dialog box
Material Schedule Type: Used to select the range of parts shown in the material schedule
Attach to anchor point: After checking, you can select which point of the material list coincides with the anchor point, which is located in the upper right corner of the title bar. If you do not check, you can move the table position as you like
- Click on the view that you want to generate the material sheet in the viewport, and the material sheet preview appears in the viewport.
If Attach to anchor point is checked, the material list appears at the anchor point, click the blank area of the drawing or click the OK button to generate the Material list
If Attach to anchor point is not checked, the material list moves with the mouse, move to the position where you want to place the material list and click the left button to generate the material list.
- The mouse points to the material list that has been generated, and control buttons and column numbers appear around the table

Drag the material list position while holding the upper left corner

Click
 to hide/show the table head
Click
 to hide/Show the "Parts" column.
Point your mouse over the picture in the "Parts" column to display the parts thumbnail
Note:
The material specification sheet attached to the anchor point at generation cannot be moved
# Edit Table Form
Support the material list to divide, merge cells, add or delete columns and other operations.
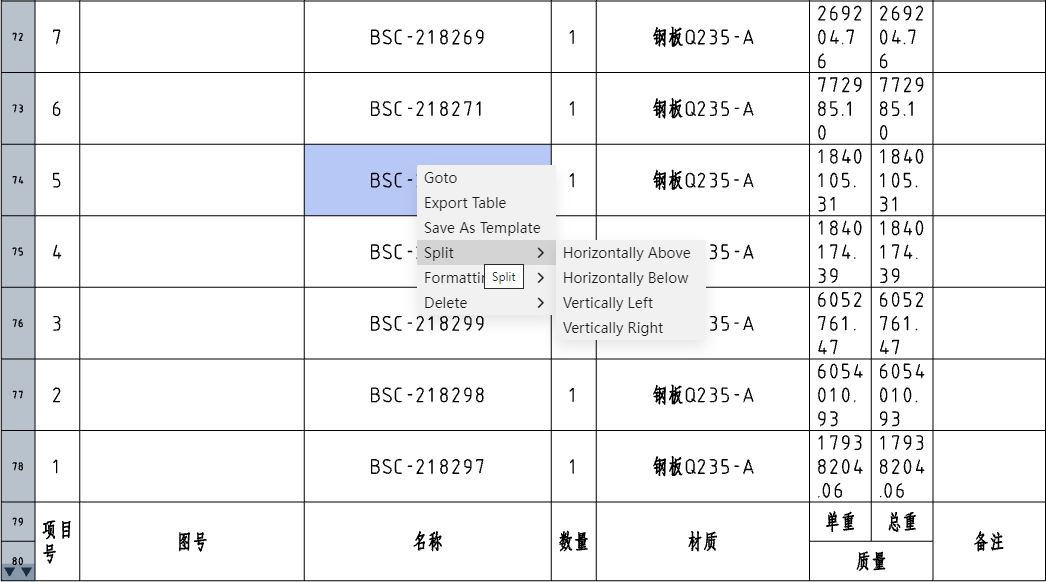
# Split Table
The form can be divided into sections horizontally or vertically.
- You can set the table to be divided horizontally or vertically according to the current row or column by right clicking on the cell of the desired division position and selecting the "Division" option in the pop-up menu:
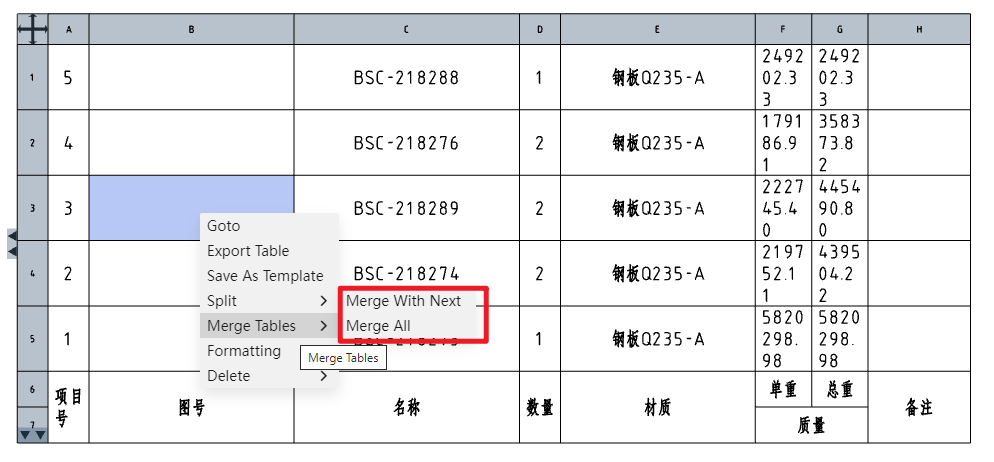
- Split the table any cell right click, in the pop-up menu "merge" option can choose to merge all the tables, can be divided the table into a whole;
# Merge Cells
- Merge cells: Select more than one cell in the table to merge.
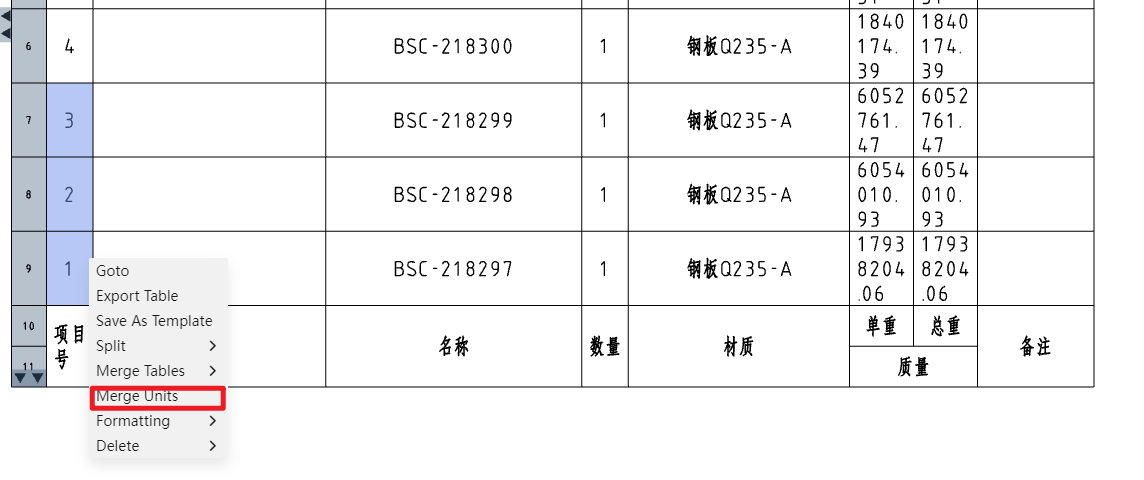
- Hold down the left key and drag in the table, or hold down Shift and click on two different cells to select a region of cells that can be merged.
- Scattered multi-selected cells cannot be merged by holding down Ctrl.
- You cannot merge if the selected cell contains cells that have already been merged.
- Unmerge cells: Cells that have been merged can unmerge cells, content handling rules:
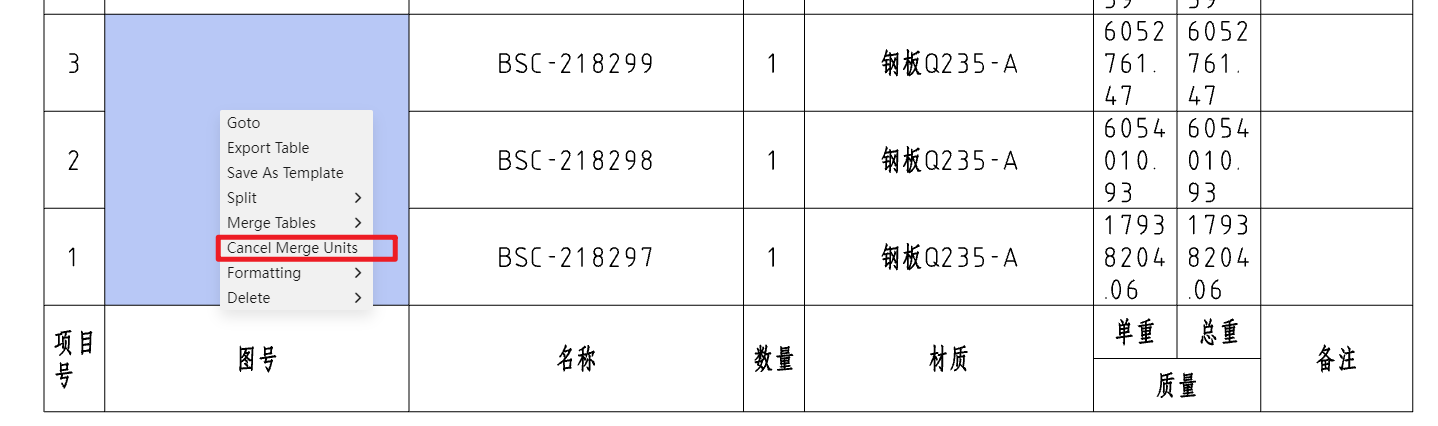
- Let the contents of cell A be filled into the merged cell when merging cells.
- Then, when the merged cells are unmerged, the contents of the merged cells are filled into cell A, and the contents of the other cells before the merger are restored.
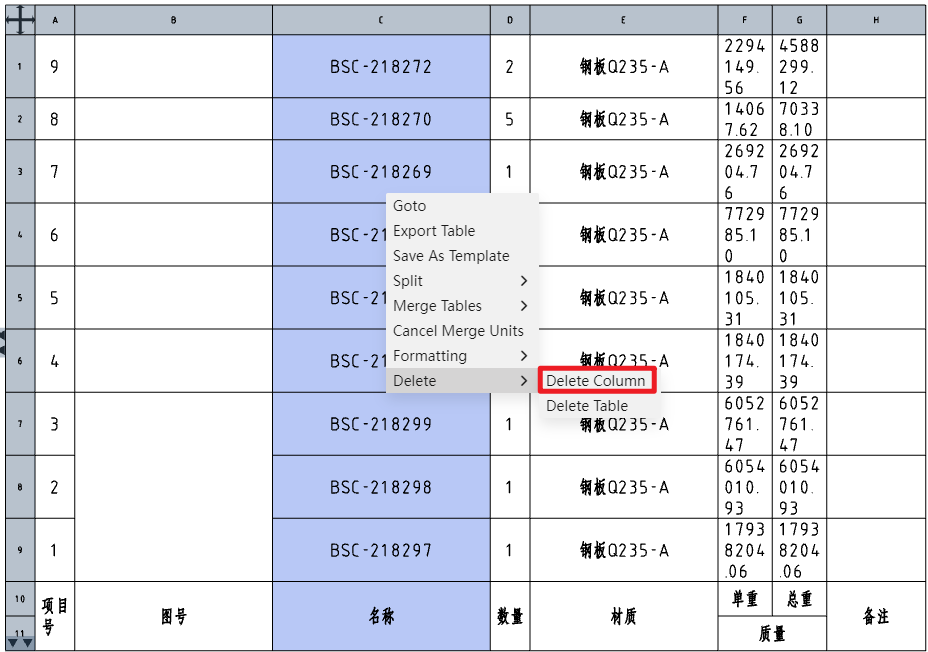
- Delete column: Click the column number, select the whole column, right-click menu "Delete" appears in the "Delete column" option:
# Edit Table Contents
Support to modify the table content, the associated content can be retained or disconnected.
- Support to modify the content of the form, the associated content can be retained or disassociated
- Double-click a cell to modify the contents of the cell
- If the cell content is associated with a model property, a dialog box will pop up before the modification asking if you want to keep the association
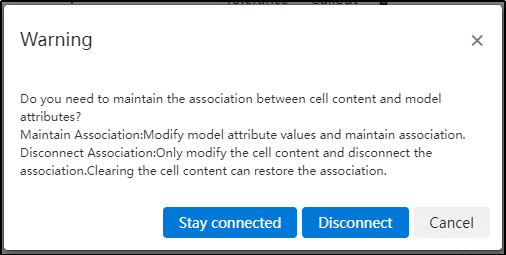
- Keep the association: Modify the model properties simultaneously to keep the association. If the value of the property corresponding to the cell content cannot be modified (such as the quantity), this item is not available.
- Disassociation: Only the cell contents are modified to disassociate from the model properties. Clear the cell, you can restore the association.
- Cancel: Do not edit;
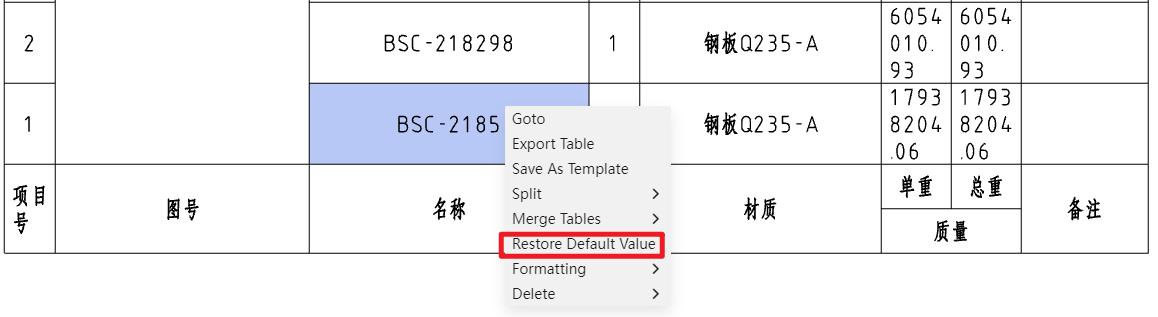
- When the cell content is different from the associated value, you can right-click "restore default value" to restore the default associated state and display the attribute value.
- There are two ways to delete the cell content, with different results.
- Click on the cell, delete deletes the content, the cell content is empty, disconnect the association.
- Select a cell, right-click the menu and choose "Restore default value", you can restore the association, the cell content is the original association attribute value.
- Table cells such as material detail sheet support input equations.
- Enter "=x+x" as well as any other supported formulas and insert the formula result into the cell by clicking Enter or clicking the blank space to end the input
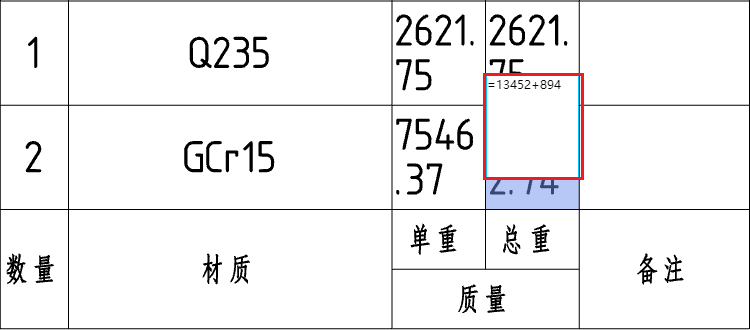
- The formula for the computable result requires:
- The formula begins with an equals sign.
- Only operators and numbers are supported in formulas.
- If the calculation result cannot be obtained (such as input =1/0 or the formula contains uncomputable text such as letters), the input formula is retained;
- When editing cells again, the content shows a formula such as "=x+x" instead of the result, and can be modified.
- The formula begins with an equals sign.
- Enter "=x+x" as well as any other supported formulas and insert the formula result into the cell by clicking Enter or clicking the blank space to end the input
# Toggle Column Properties
Double-click the column number to pop up the "Table" property box, which can switch the property value of the current column:

- Supported column properties:
- Custom properties: Select properties from the custom properties template, figure number, etc.
- When selecting the weight, two sub-options of "single piece, total" are displayed, and single piece is selected by default.
- Item number: The item number corresponding to the part serial number function.
- Part Number: The name of the part, which is the name of the document.
- Standard part attributes: The specification of the standard part, optional "Part name, specification, annotation"
- Custom properties: Select properties from the custom properties template, figure number, etc.
- By default, the title of the table header is the same as the selected property name. You can double-click a cell in the table to modify it.
# Modify the Parts Order
Drag and drop Modify order: You can change the order of parts in the material specification by dragging up and down the label representing the row on the left side of the table.
- Drag and drop is not supported after multiple rows are selected.
- For the "indent" type table, you can only drag and drop parts in the same level to change the order, you can not change the level of the parts. When you drag a parent part, the child part changes the order.
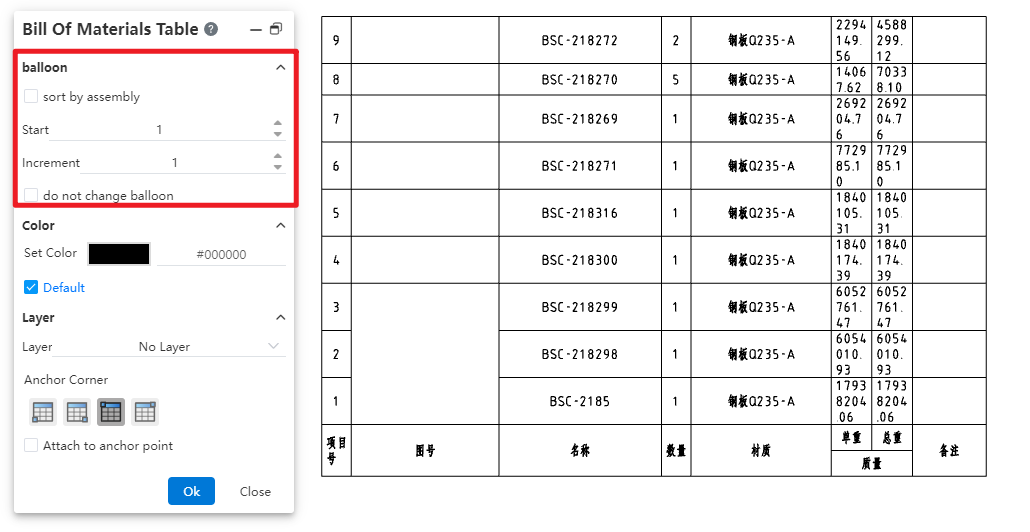
Modify the order through the dialog options:
- By assembly order: Check this, do not allow drag and drop to modify the order; And reorder the top parts of the material list according to their order in the assembly, without changing the order of parts in the sub-assembly.
- By subassembly Order: This option is available only when Sort by Assembly is checked. Check this so that the order of the parts in the subassembly of the Material Specification sheet is reordered in the order in which they are in the assembly.
Related features:
- Starting, increment: The starting number and increment of the parts can be set. Only positive integers can be entered.
- Do not change item number: Check this to change only the order without affecting the serial number when parts are reordered in the material list by drag and drop or dialog box options.