# General Table
Generate different types of tables in the drawing and automatically fill in the relevant data according to the model properties.
Click the summary table command  to pop up the dialog box:
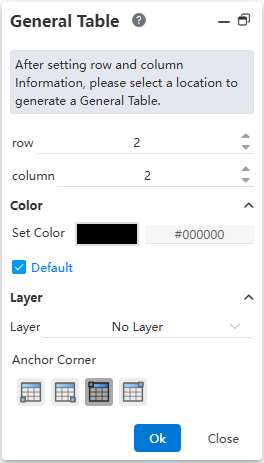
Modify the number of rows and columns of the table to be inserted; Move the mouse to the viewport and click to display the table preview. The lower left corner of the table overlaps with the mouse. Move to the desired position and click to generate the table.
Color: Sets the color of the table.
Anchor Corner: Controls which corner of the table remains fixed when adding or deleting rows or columns.
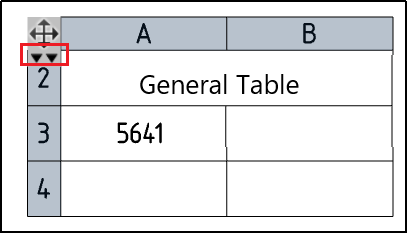
Move the mouse over the table and the AB/12 serial number representing the column/row appears.
Double-click the cell to edit the text in it.
Right-click menu on a single cell - Split cells, Multiple Right-click menu - Merge cells.
You can set the line type and line width of the inside and outside edge line wireframe separately.
Display table head: Click the icon here to display the master table or other names.