# Revise Table and Revision Symbol
Support for generating revision tables and associated revision symbols in drawings.
Click  on the toolbar to open the revision table command dialog box, and its command interface is as shown in the following picture:
# Parameter Description
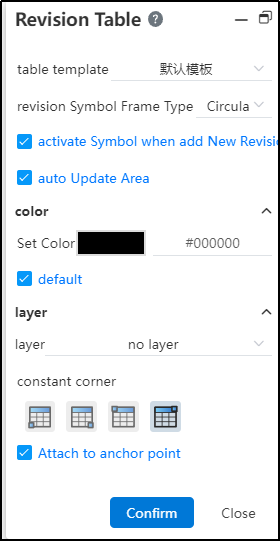
Revision Symbol Shape: Set the default shape of the revision table corresponding to the revision symbol. The default is circle.
Activate the symbol when adding a new revision:
- Checked (default) : Automatically start the revision symbol command after adding a new line by clicking the "Add Revision" button in the lower left corner of the revision table in the viewport
- Unchecked: The revision symbol command is not automatically started after a new line is added by the "Add Revision" button in the lower left corner of the revision table in the viewport.
- Automatically update zone cells:
- Checked (default) : The contents of the revision table area cells are automatically updated when moving revision symbols are added or deleted in the drawing
- Unchecked: The contents of the zone cells remain unchanged until the user checks this option.
Attach to Anchor points: Checked (default) : Attach the upper right corner of the table to the revision table anchor point in the upper right corner of the chart box.
Points where the table overlaps with anchor points:
- This button does not appear when the revision table is created;
- Control the points in the table that remain stationary when adding or deleting columns;
- The fourth is selected by default;
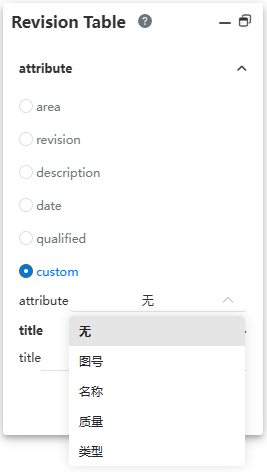
- Select Revision Table 1 column of cells to display:
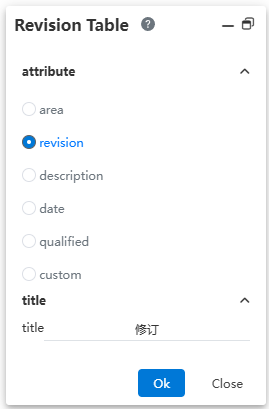
- Zone, Revision... : Displays the current content type of the selected column, you can click Modify to another type;
- Properties: This item appears only when you select Custom. Select the custom properties that can be read in the project drawing from the drop-down menu, and the properties are automatically filled in the table.
- Title: Sets the title name of the table header for this column.
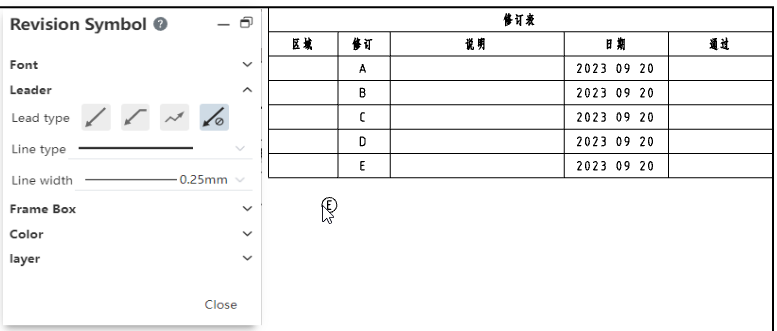
- Revision symbol function interface:
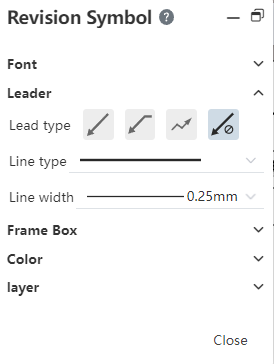
- Font: Set revision symbol font, size;
- Lead: Set revision symbol lead style, default no lead;
- Frame: Select the style of revision symbol, support round, rectangular, flag Deng style;
- Color: Set the color of the revision symbol.
Note:
① Insert a maximum of one revision sheet into each engineering drawing;
② The revision table must be inserted and at least one row created in order to use the revision symbol command. Otherwise the revision symbol command is gray and unusable.
# Create Flow
- Start the Revision Table command
Click the "Revise Table" command from the table drop-down menu to bring up the "Revise Table" dialog box.
- Insert "Revision Table"
- Set the revision table parameters in the Revision Table dialog box;
- Click the OK button to insert the revision table in the upper right corner of the picture box.

- To create a version:
- Point your mouse to the revision table in the view;
- Click the "Create Version" button to add a new row to the table and automatically launch the "Revision Symbol" button.

- Set the "Revision symbol" parameter
Adjust the Redact symbol style, font, etc., in the Redact Symbol dialog box.
- Insert "Redact symbol"
- Move your mouse over the viewport to where you want to insert the "revision symbol"
- Click the left mouse button to generate the revision symbol.

- Repeat insert "Revision symbol"
Repeat Steps 5 to 6 to generate multiple revision symbols.
- End
Click the close button or press Esc to exit the command.