# Linear Sketch Pattern
Arrange one or more sketch elements in one or two directions for a finite number of duplicate elements.
Detailed parameters and drawing steps are as follows:
Drawing steps
1.Click on the sketch module "Linear Sketch Pattern" to open the linear sketch array dialog box.
2.Dialog box control description:
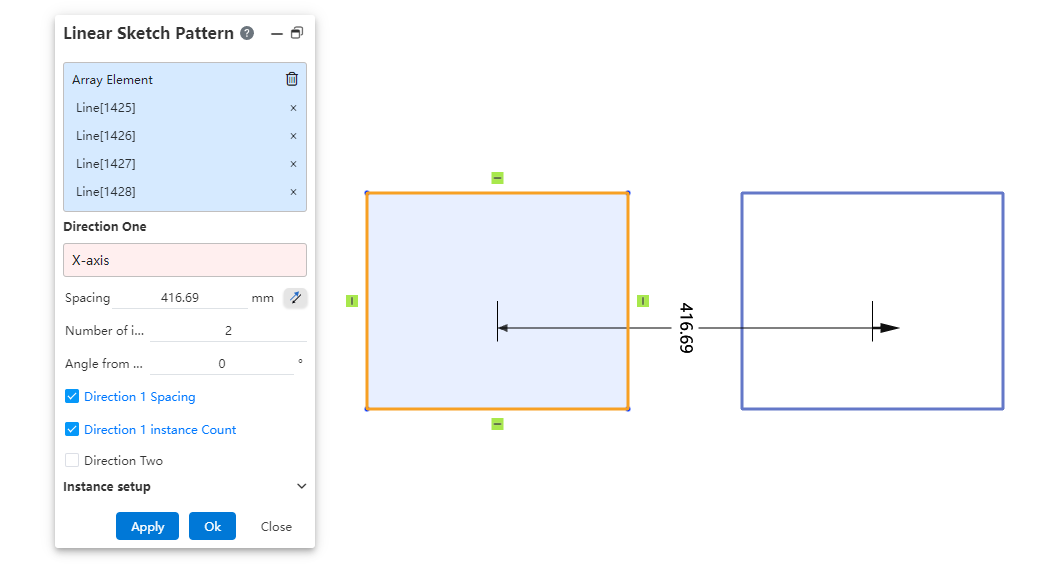
Elements to array: Select a line or draw point within the current sketch as the array source
- Multiple choices are available.
- Can pick up lines, arcs, splines, draw points.
- Each line should be selected as a single element, such as each edge of the polygon is a separate element when picked up.
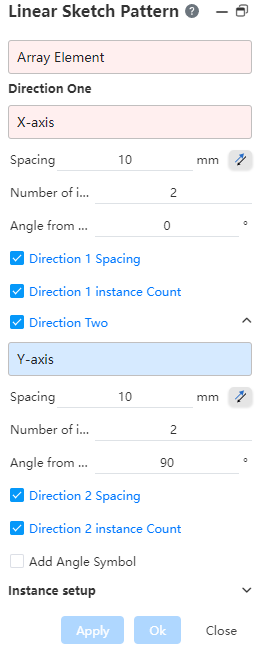
Direction 1: Set the parameters of array direction 1. Click the arrow behind to expand and collapse the related Settings.
- Direction 1: Select a line to define the array direction. If no element is selected, the default array direction is the X-axis.
- Distance: Enter the spacing between instances in Direction 1. The Reverse button can be used to invert the array direction.
- Instances: The number of instances on input direction 1.
- Angle with X-axis: When direction 1 does not pick up elements, rotate the Angle of this option counterclockwise in the direction X of the current sketch as direction 1.
- Label Direction 1 Spacing: Controls whether a distance dimension is generated.

- Annotated direction 1 Instance count: Used to control whether to generate quantity annotations.

Direction 2: Sets parameters for array direction 2.
- Direction 2 Tick box: Controls whether instances are generated on direction 2.
- The default Angle to the X-axis is 90°.
- The other Settings are the same as for direction 1.
Instance setting: Set the function of "array source only, skip instance", click the arrow behind to expand and collapse the related setting items.
- The use of "array source only, skip instance" is the same as the linear array function of the entity module.
3.The element after the array adds the "array" constraint.
- The "array" constraint keeps the instance geometry in sync with the source and keeps the instances relative to each other.
- If the array constraint exists, modify the quantity label to change the number of arrays.
- The array constraints generated by each array are associated. Delete the array constraints on any instance, and the array constraints on the instances generated at the same time are deleted. For example, perform an array generation ABC, and then an array generation DEF; Delete the "array" constraints on B, ABC's "array" constraints all disappear, DEF's "array" constraints remain unchanged.
- After removing the "array" constraint, the geometry of the instance and source no longer remain associated; The size constraint no longer controls the instance spacing, but only the distance between the two elements that are labeled.
4.Deleting lines affects the synchronization state
- Delete a line from any instance, and the line geometry is still in sync with the source on other instances.
- Delete a line on the source, and the line geometry is no longer synchronized on other instances.
- After all instances generated by Array are deleted, the array constraint disappears.
5.The instance line generates the same guideline state as the source. After generation, the guide state of any line can be modified independently, not affected by the array constraint.
6.When the element picking is completed, which can support the creation of the command, the right mouse button displays the confirmation identifier, as follows:
7.You can confirm the creation by clicking the right button, which is equivalent to the OK button, you can create a linear array; Click close to exit the linear array.
8.Array generated elements support editing, such as adding rounded corners, etc.