# Circular Pattern
Rotate a body or feature as an axis of rotation according to a line or two points, and rotate a limited number of duplicate entities or features uniformly by axis according to the set angle.
Click the toolbar  to open the Circumferential Array Command Dialog, whose command interface is shown in the following figure.
Circular array command is divided into two command pages: Entity Array, Feature Array, corresponding to two different array types.
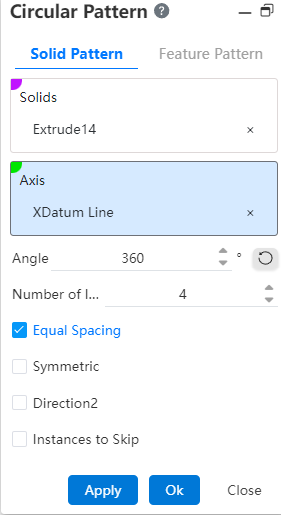
# Solid Pattern
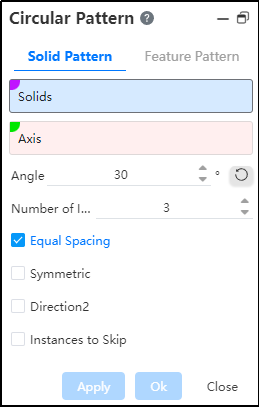
Entities: Pick up entities that require array operations.
Axis: Pick up an axis to use as the axis of rotation or select a solid circumferential or curved surface.
Note:
The axis can be a sketch line, two points, a solid edge line, or a reference reference line, and the center axis is automatically calculated as the axis of rotation when selecting a circular surface.
Angle: Sets the rotation angle of the ring array at this angle, which can be used with equal spacing.
Reverse: Previews the model when checked in the opposite direction to the currently selected direction.
Number of instances: The number of entities arrayed in the current direction.
Equal Spacing: Checked by default to divide the rotation angle equally according to the instance count. When unchecked, set the angle as the rotation angle spacing for the model in each instance count.
Symmetry on both sides: When checked, the left and right sides are arrayed at the same time.
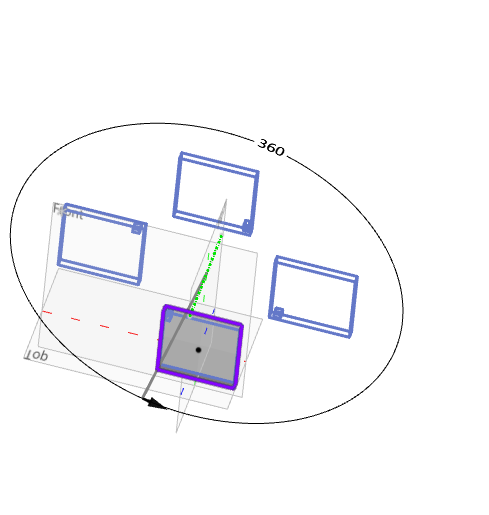
Example: Pick a sketch line as the pattern axis, set the parameters, and the solid array effect is shown in the following figure.
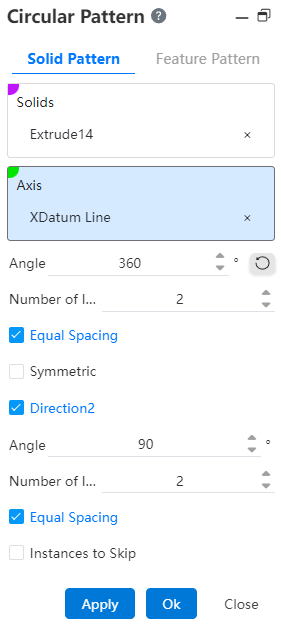
- Direction 2: When there is other need, you can check the Direction 2 option, or skip the instance option, and the interface changes to the following figure.
Add controls in that direction to the boundary plane:
1)Angle: Sets the rotation angle of the ring array at this angle, which can be used with equal spacing.
2)Number of instances: The number of entities arrayed in the current direction.
3)Equal Spacing: When checked, the rotation angle is divided equally according to the number of instances. When unchecked, set the angle as the rotation angle spacing for each of the two models.
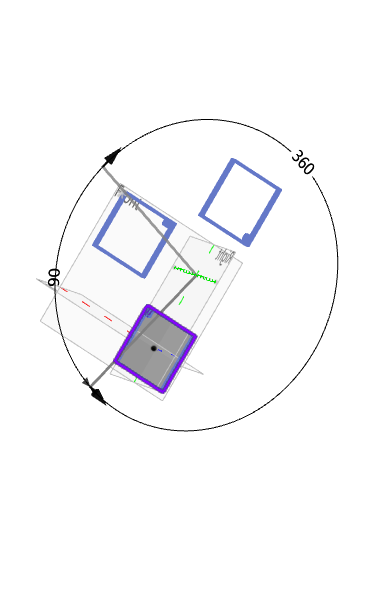
Example: Select Direction 2 to set the parameter, and the preview effect is shown in the following figure.
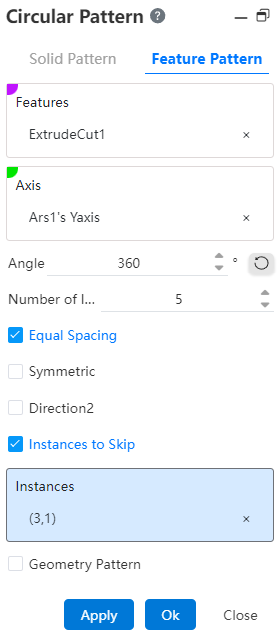
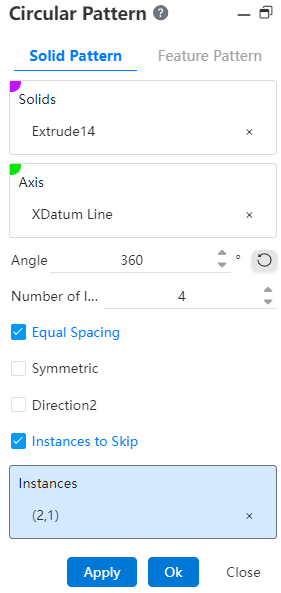
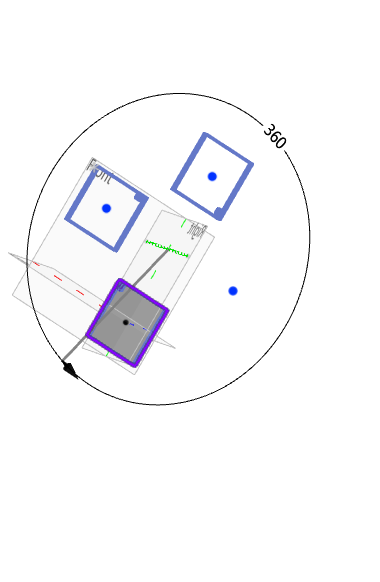
- Skip Instance: When checked, select the model you want to skip in the array preview and do not generate the model.
Example: After selecting the Skip Instance option, the preview effect is shown in the following figure.
# Feature Pattern
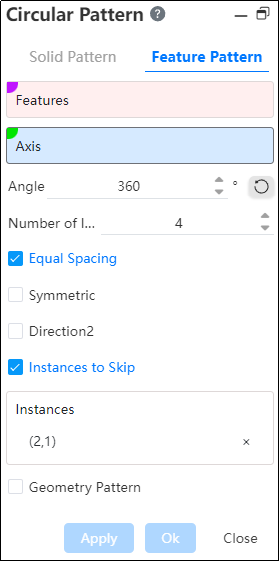
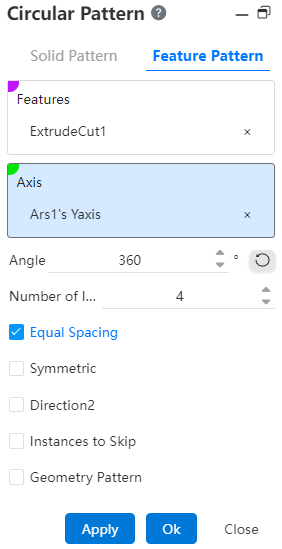
- Features: Pick up the features that require an array operation.Support selecting already arrayed features as source features for further arraying.
Note:
Arrays of multiple features can only be made on one entity; Each time a feature is regenerated, it is applied to the same entity, and if the feature is in an entity that does not exist, the pattern fails.
- Axis: Pick up an axis as the axis of rotation or select a solid circumferential or curved surface.
Note:
The axis can be a sketch line, two points, a solid edge line, or a reference reference line, and the center axis is automatically calculated as the axis of rotation when selecting a circular surface.
Angle: Sets the rotation angle of the ring array at this angle, which can be used with equal spacing.
Reverse: Previews the model when checked in the opposite direction to the currently selected direction.
Number of instances: The number of features patterned in the current direction.
Equal Spacing: Checked by default to divide the rotation angle equally according to the instance count. When unchecked, set the angle as the rotation angle spacing for the model in each instance count.
Symmetry on both sides: When checked, the left and right sides are arrayed at the same time.
Geometry Pattern: Generates a pattern using only the geometry (faces and edges) of the feature, not every instance of the pattern and solves the feature.
Note:
The Geometry Pattern option accelerates feature generation and reconstruction. However, if the faces of some features are merged with the rest of the part, you cannot check a geometry array.
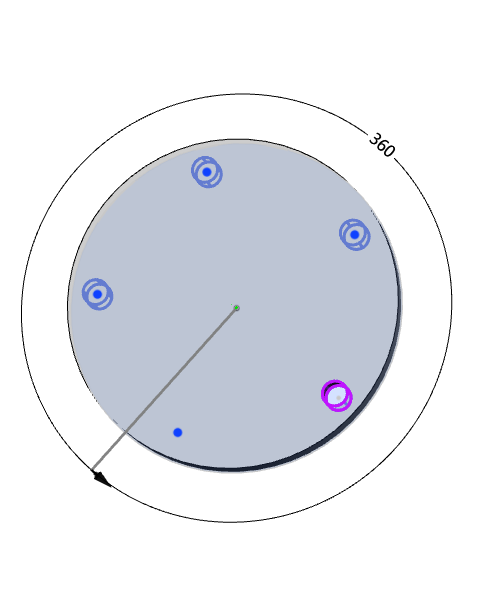
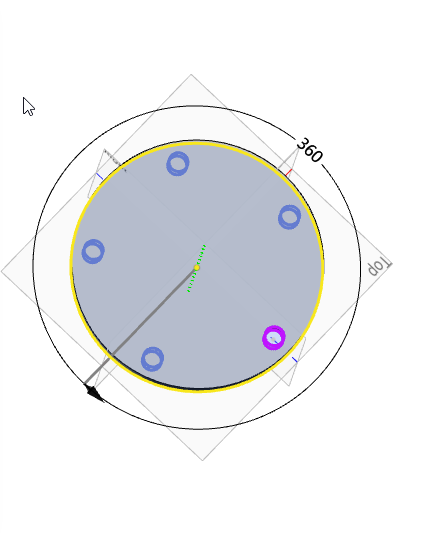
Example: Take the extruded excision feature as an example, and the feature pattern is shown in the following figure.
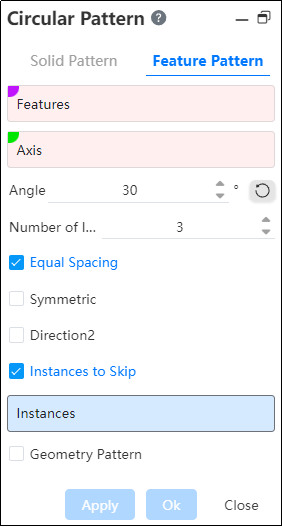
- Direction 2: When you need to also array in the second direction, check the direction 2 option at this time, and the interface changes to the following figure.
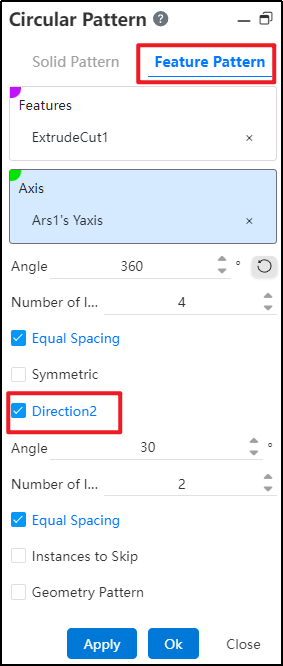
Add controls in that direction to the boundary plane:
1)Angle: Sets the rotation angle of the circular array at this angle, which can be used with equal spacing.
2)Number of instances: The number of entities arrayed in the current direction.
3)Equal Spacing: When checked, the rotation angle is divided equally according to the number of instances. When unchecked, set the angle as the rotation angle spacing for each two models.
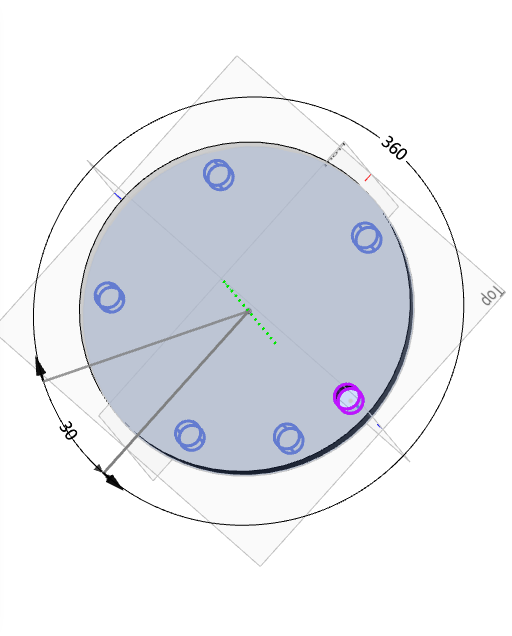
Example: After you set the relevant parameters, the feature pattern preview effect is shown in the following figure.
- Skip Instance: When checked, select the instance you want to skip in the array preview and do not generate the instance.
Note:
Click the center point of the instance you want to skip in the viewport, and the skipped instance is suppressed and the center point turns red.
Example: After checking the "Skip instance" option, the preview effect is as shown in the following picture.