# BOM Tool
The command [BOM tool] is displayed under the assembly, click [BOM tool] to pop up the dialog box:

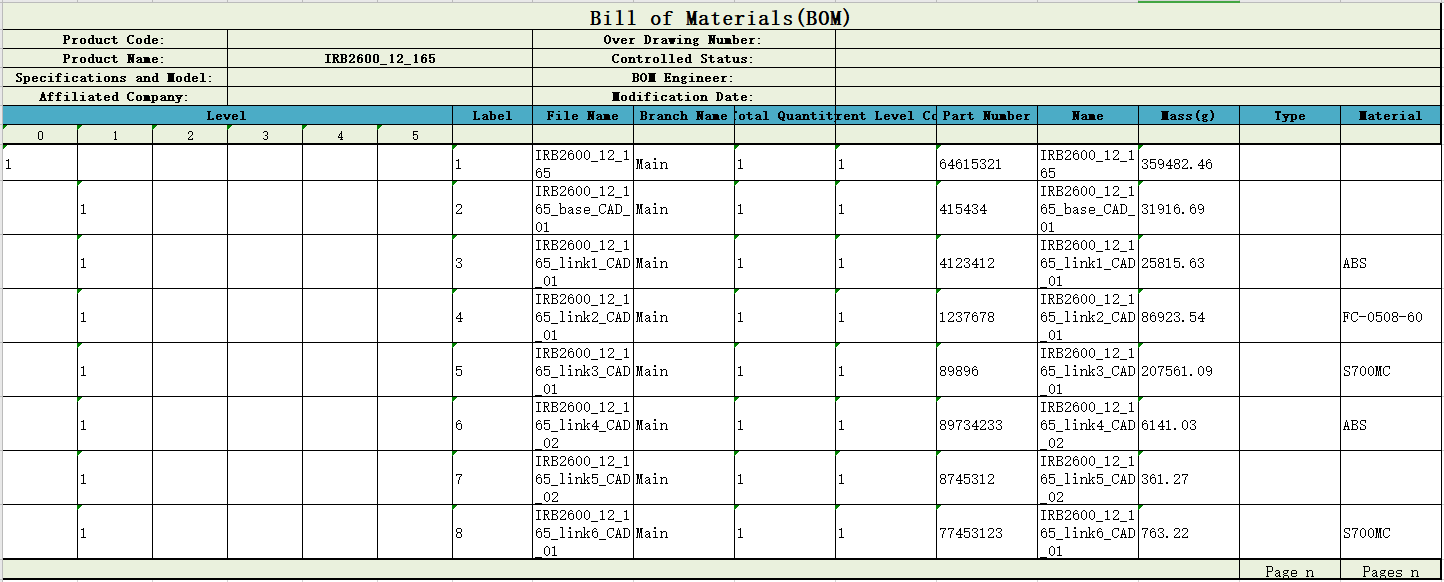
- Level table: Displays the levels and properties of all parts in the assembly.

- The values in the first 6 columns represent the number of parts in that row in that level (more columns are automatically displayed when the assembly level exceeds 6 levels).
- The current assembly is level 0, Level 1 assembly/parts is level 1, and so on; Secondary parts under each assembly are shown under their parent level parts.
- By default, the level table displays property entries in the selected property template for the current assembly document.
- Property entries for all parts of the current assembly are displayed through the [Properties] drop-down list in the upper right corner, and the selected properties are displayed in the current table. For example, the attribute template of Assembly A has the attribute entry A1.A2, the attribute entry of Assembly A has A1.A2.A3, and its part B has the attribute entry A1.B1. Then the default attribute entry displayed in the table is A1.A2, and A1.A2.A3.B1 can be selected through the attribute drop-down list.
- If the component does not have a certain attribute entry, or its attribute entry does not set an attribute value, it will be displayed as empty.
- In the setting, you can filter not to display empty lines, empty columns, etc.
- Material list: According to the order of the feature panel parts integration statistics of the attributes of each part.
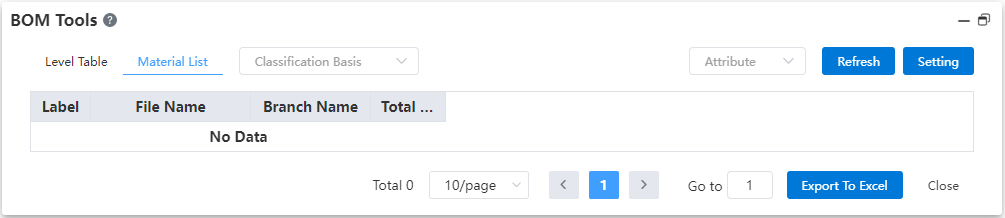
- The level number column is not displayed in the material list.
- Sort the parts in the order in which they first appear in the feature panel, and when repeated later, count the quantities to the number of rows corresponding to that part.
- Property entries show the same level table.
- In the Settings, you can set the material list type, as well as not empty list, etc.
- The types of material list are: "only parts, only the top layer, secondary parts are not labeled, secondary parts detailed labeling, secondary parts simple labeling".
- The labels of the different types of material details correspond to the functions of the engineering drawing serial number.
| Type | Instructions |
|---|---|
| Parts only | List all parts in each level of assembly and label them in turn 1.2.3... , ignore assembly |
| Top layer only | List all Level 1 parts, parts or assemblies in accordance with 1.2.3... designations |
| Secondary parts are not labeled | List all parts and label only level 1 parts. Secondary parts are not labeled, but the names are indented:Level 2 parts are indented by 1 space, and Level 3 parts by 2 Spaces. And so on. |
| Secondary part detail label | List all parts and label them all. Level 1 parts are labeled 1.2.3... Grade 2 parts are labeled 1.1, 1.2... . (the front 1 is the upper assembly label) Level 3 component labels are 1.1.1, 1.1.2... (the previous 1.1 is the upper assembly label). And so on. Meanwhile, secondary part names have the same indent effect as "secondary part unlabeled" |
| Simple label of secondary parts | List all parts and label them all. Regardless of part level, all parts are labeled 1.2.3 in the order that they appear in the table... At the same time, secondary part names have the same indent effect as "secondary part unlabeled" |
- Classification function: Based on the current table, select the type to be classified by (attribute) and the type to be displayed in the attribute, and display the rows that match the selected type.

- If materials are selected according to classification, all materials of the parts in the current assembly are displayed in the drop-down box behind, click the drop-down box to select the materials to be displayed (multiple selection), the rows of the selected materials are displayed, and the other rows are hidden.
- According to classification, you can select "No classification" and "property name in the current table".
- The latter drop-down box is not displayed when you select No category.
- After selecting a property, the latter dropdown box shows "Select All" and "Property Values".
- Export to Excel with customizable templates supported.
- Clicking "Export to Excel," a template selection dialog box pops up. After choosing a template, click OK, and the BOM table will be exported in the selected template style (For the customization of the BOM table export template, see Template Management).

Note 1: When some documents do not have certain listed attributes defined, those attribute fields will display as blank.
Note 2: Material displays the document's material.Single item weight = density of each entity's material * volume of each entity in the component.Total weight = single item weight * quantity of that component.
- Piping BOM: The existing 【BOM Tool】 supports summarizing piping BOM information.
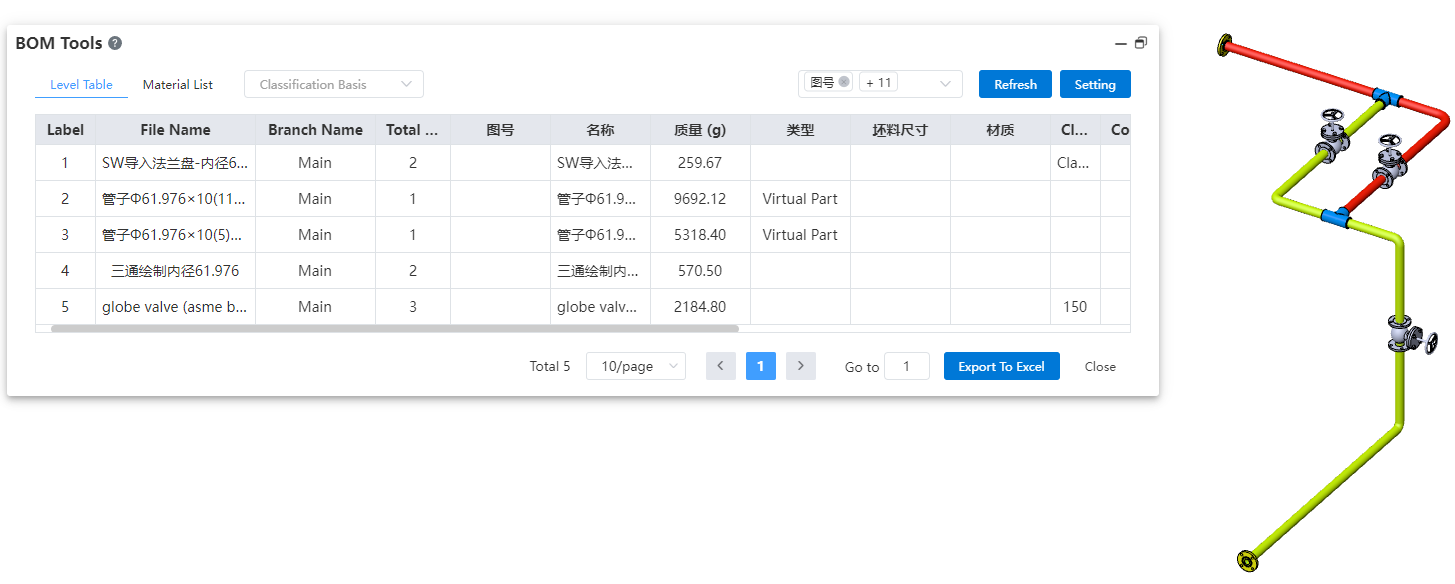
The BOM Tool adds additional identifiers to pipes, enabling accurate recognition of piping sub-assemblies, components, and fittings within the piping system.