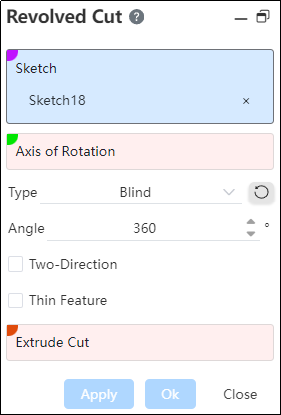
# Revolved Cut
The closed-loop contour is rotated into a body according to a certain rotation angle by the axis of rotation, and the part that intersects the rotating body is removed from the excision body.
Click the toolbar to  open the Rotate Cut Command dialog box, and its command interface is shown in the following figure.
Sketch:Activates the Sketch command to rotate the cut sketch when the sketch is complete.
Select a sketch or plane to sketch :
Pick a sketch profile for the revolved boss.
Pick a plane/datum plane, enter the sketching state, and after sketching and exit, automatically fill the drawn sketch into the pick box.
Note:
Sketch can contain multiple areas that do not intersect.
- Axis of rotation: The central axis of rotation of the sketch.
If the sketch meets the following conditions, the guide line within the sketch is automatically picked up as the axis of rotation.
- The sketch has one or more contours that can be rotated, and in addition to the contours, there is only one guide line;
- The reference line is a straight line;
If the automatically picked rotation axis does not generate the rotation feature, such as the rotation axis intersects the contour, an error is reported;
Supports the selection of multiple types of elements as rotation axes:
- Straight line: sketch line, solid edge line or reference base line;
- Circular edge line: perpendicular to the plane where the circle is located, and the straight line past the center of the circle is used as the rotation axis;
- Cylindrical surface: the axis of the cylinder is used as the axis of rotation;
- Two points: A straight line formed through two points serves as the axis of rotation.
Note:
The axis of rotation should be in the same plane as the sketch and should not cross the sketch. The axis of rotation can be a sketch line, two points, a solid edge line or a reference base line.
Method: There are three ways, the way is "given Angle", "shape to the surface", "bilateral symmetry", choose different ways and rotation angles have different rotation effects.
Angle: Rotate the Angle in the positive direction. Point in reverse if necessary.
Direction 2: Define the rotation feature from the other direction of the plane in which the sketch is located. There are two ways to do this, called "Given Depth" and "Shape to Face."
Thin-wall feature: After checking, the sketch outline can be rotated and thickened to form a thin-walled entity before being cut out.
- When the selected outline sketch has open loop lines, the thin-wall feature is selected by default;
- When all the selected contour sketches are closed-loop lines, thin-wall features are not checked by default.
- Excised body: the body being excised by rotation.
Note:
The excised body should intersect with the main body.
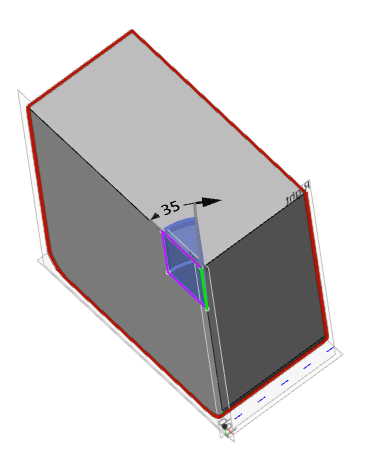
# Blind
Angle:Rotates the angle in a positive direction using the sketch plane as the datum.
Reverse::After the point is reversed, it rotates in the opposite direction of the current rotation.
Example: Create an entity and sketch a rectangle on the side, with the preview as follows:

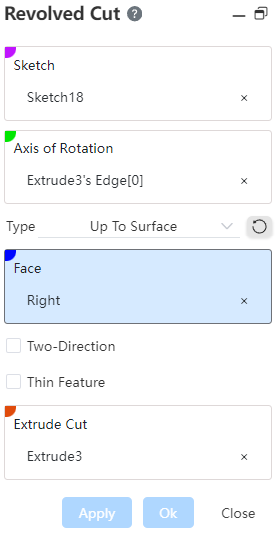
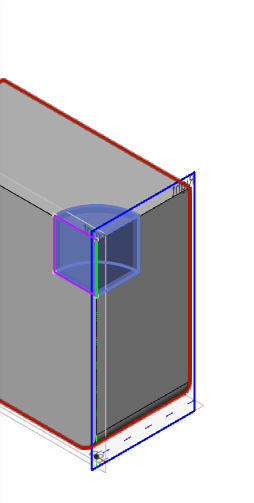
# Up To Surface
1.Face:Select a face to extend to.
Note:
Faces can be solid faces, planes, surfaces, or planes.
2.Reverse:After the point is reversed, it rotates in the opposite direction of the current rotation.
Example: Create an entity and sketch a rectangle on the side, shaped into a solid face, with the preview effect as follows:
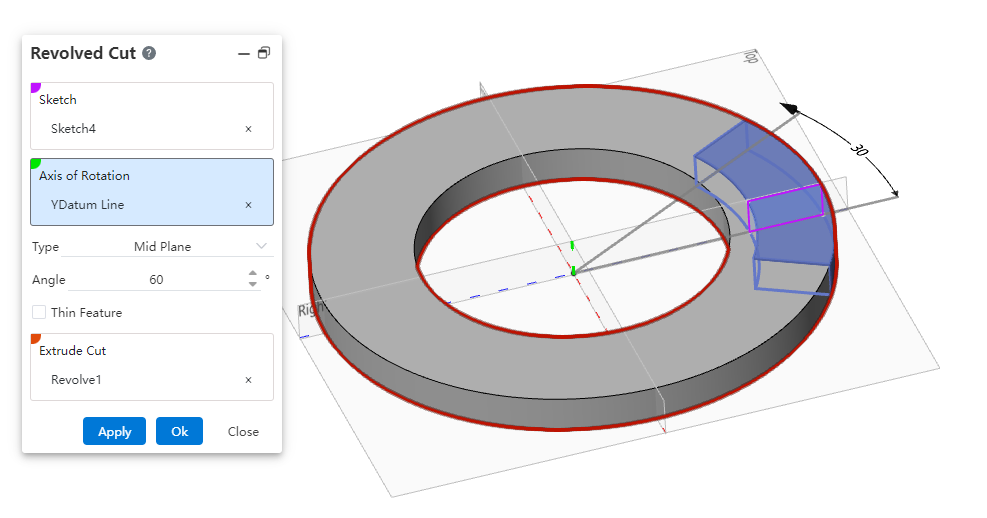
# Mid Plane
Angle:Rotates the angle to both sides with the sketch plane as the datum.
Example: Create an entity and sketch a rectangle on the side, with the preview as follows:
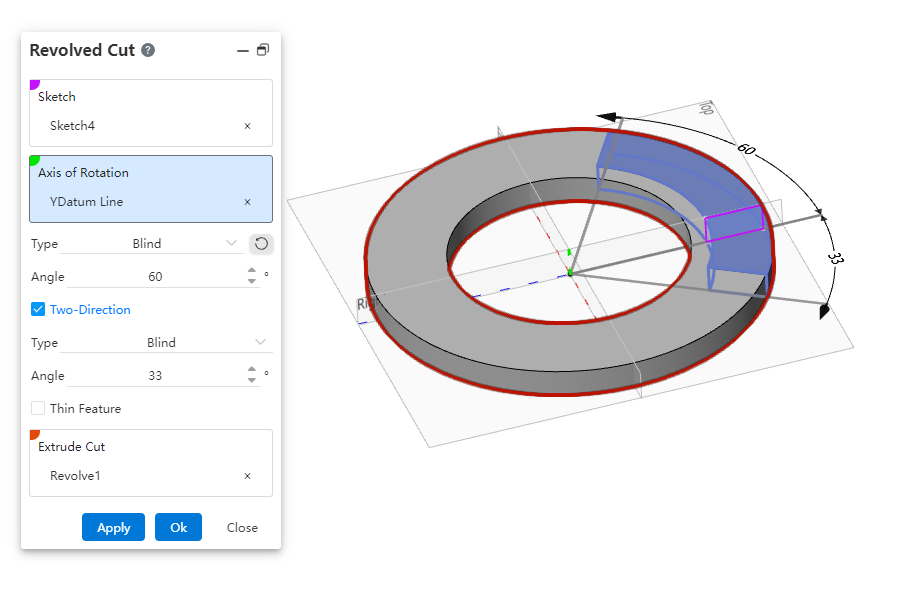
# Two-Direction
1.With Direction 2 checked, rotate the sketch plane in both directions at the same time.
Note:
When the rotation mode selects the symmetry of the two sides, there is no direction 2 option.
2.There are two ways to rotate:"given depth" and "shape to surface", in the same direction 1.
Example: Set the relevant parameters, check the direction 2 and then rotate the excision effect as shown in the following figure.
# Thin Features
For details, see Thin Features.